INSTALLING THE TICKET24 APPLICATION FROM THE MARKETPLACE

1. 

Go to the section Applications → Market.

On the page you will find collections of applications by categories and new releases from the marketplace.

2.

Search Ticket24 in the application catalog.

3.

Go to the application and click «Install».

After installing the application enter your name, phone number, and email.

BASIC SETTINGS OF TICKET24

CREATING A CLIENT AND PASSWORD FOR THE APPLICATION IN CRM

1.

After installing the application grant the client access to the application.

Go to the «Customers» → «Contacts» section.

2.

Add the Contact to the Client Database.

3.

Enter the required fields: First Name, Last Name, email, and client password.

The Ticket24 password field is automatically created during the application installation.

The password field can be renamed.

CHANGING THE NAME OF THE USER FIELD FOR STORING THE CLIENT'S PASSWORD

1.

Go to the section «Settings» → «CRM Settings».

2.

Go to the section «Form and report setting» → «Custom Fields».

3.

Go to the section «Contact» → «Fields».

4.

Click the «Edit» button to edit the client's password field.

5.

Change the field name to the desired title.

MAIN SETTINGS

Set the company name, upload the logo, choose the password field in Contacts.

Select the field, where the client's password for logging into Ticket24 is stored.

By default the 'Ticket24 password' field is selected.

Group settings

Set up a workgroup (e.g., company department) and assign responsible individuals (employees) for ticket processing.

Customer requests come as tasks to your portal in the group you specified during the installation of this application.

CREATING A WORKGROUP IN CRM

1.

Go to the «Workgroups» section and click «Create».

2.

Select the project type «Workgroup» and click «Next».

3.

Enter the workgroup name. For uniqueness, choose a theme and an avatar.

4.

In the advanced workgroup settings, specify the tools of the workgroup, select the «Tasks» checkbox.

5.

Choose the privacy level for the workgroup as «Private».

6.

Add employees.

Important note! When you add employees to the group, they will be the ones, who can see the tickets in your workgroup.

Tags settings

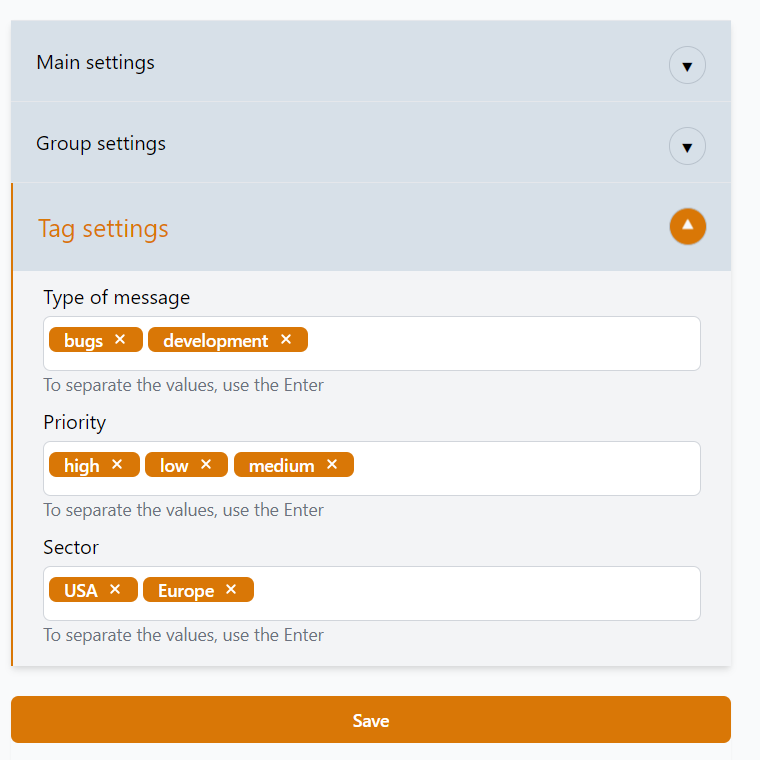
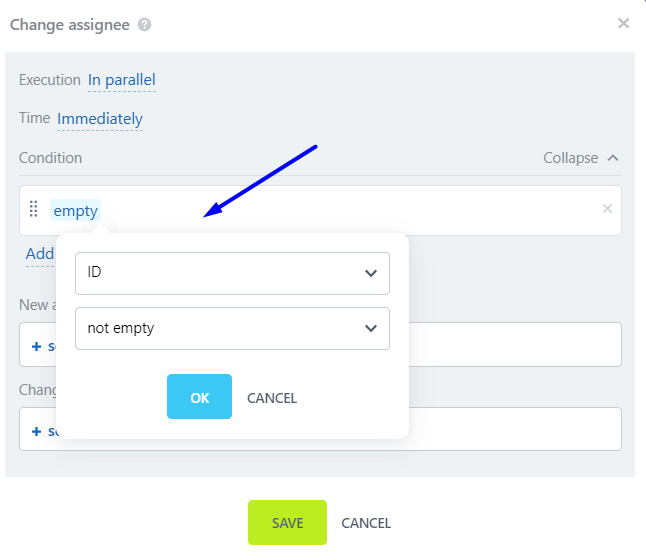
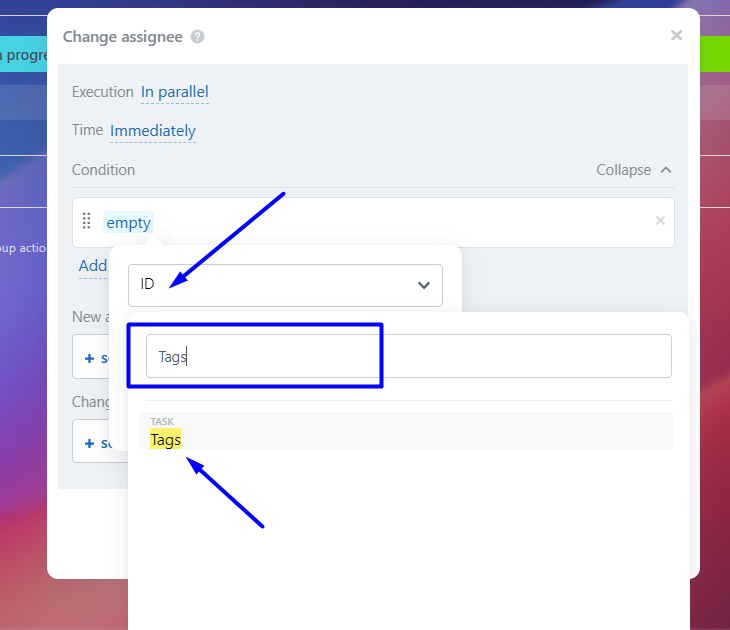
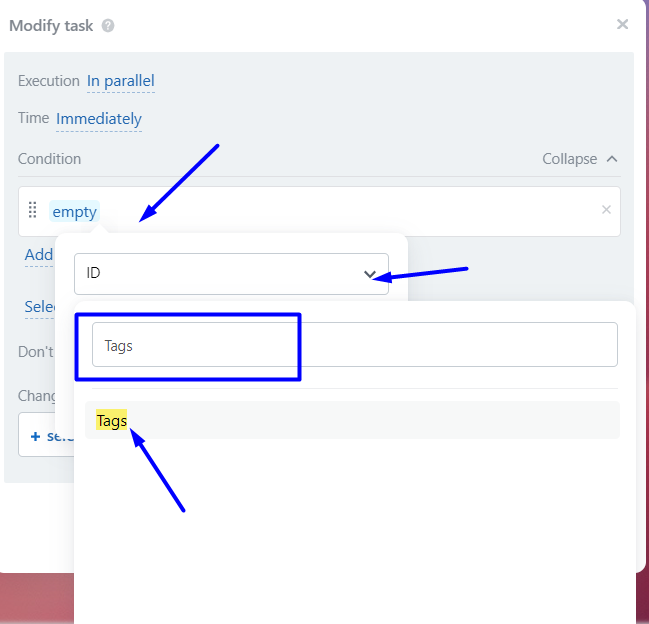
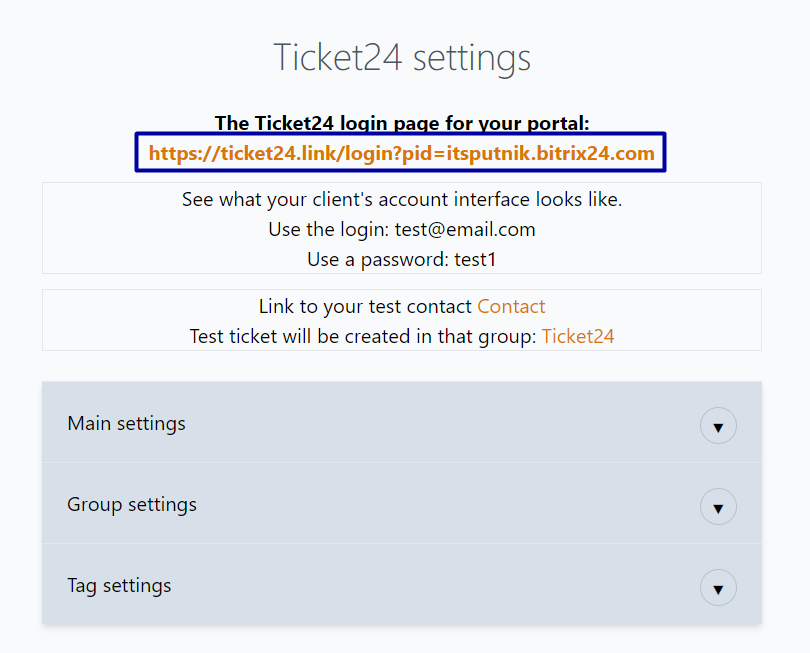
Enter tags for ticket processing rules.

When creating tags in each section: enter the text and press «Enter» after each tag.

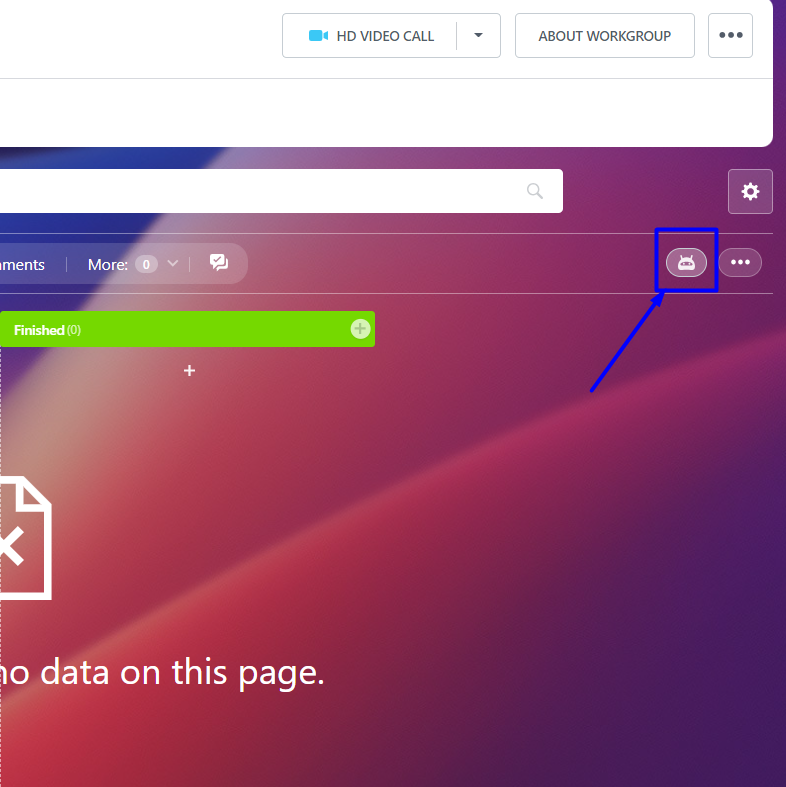
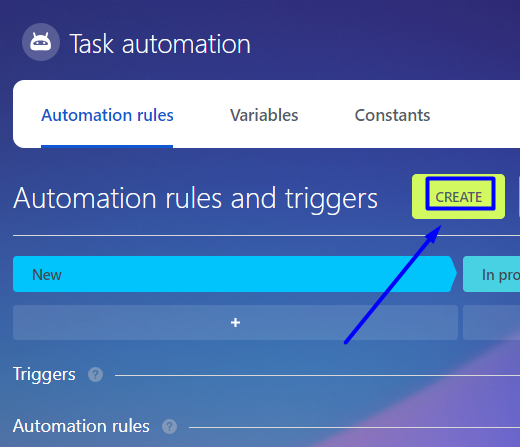
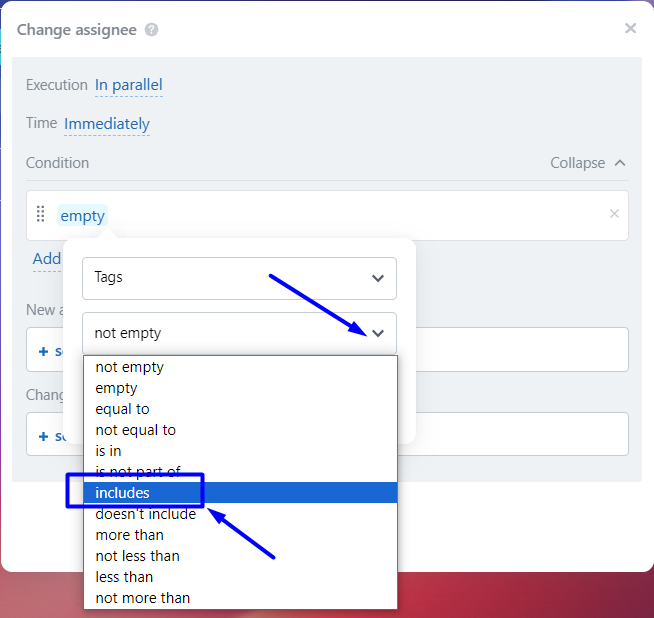
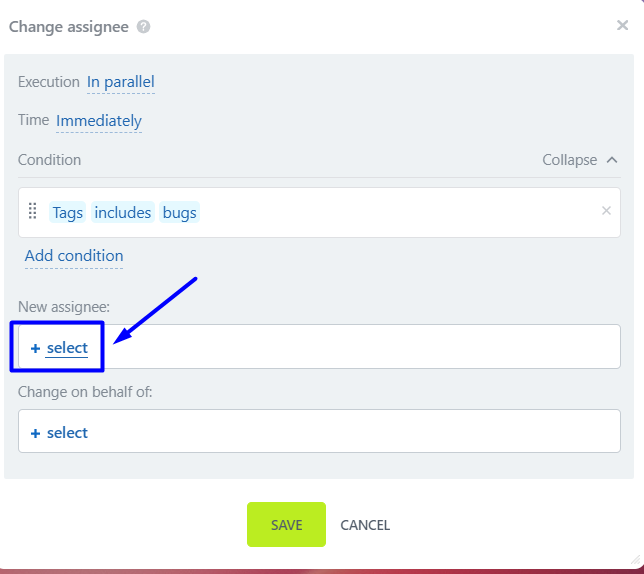
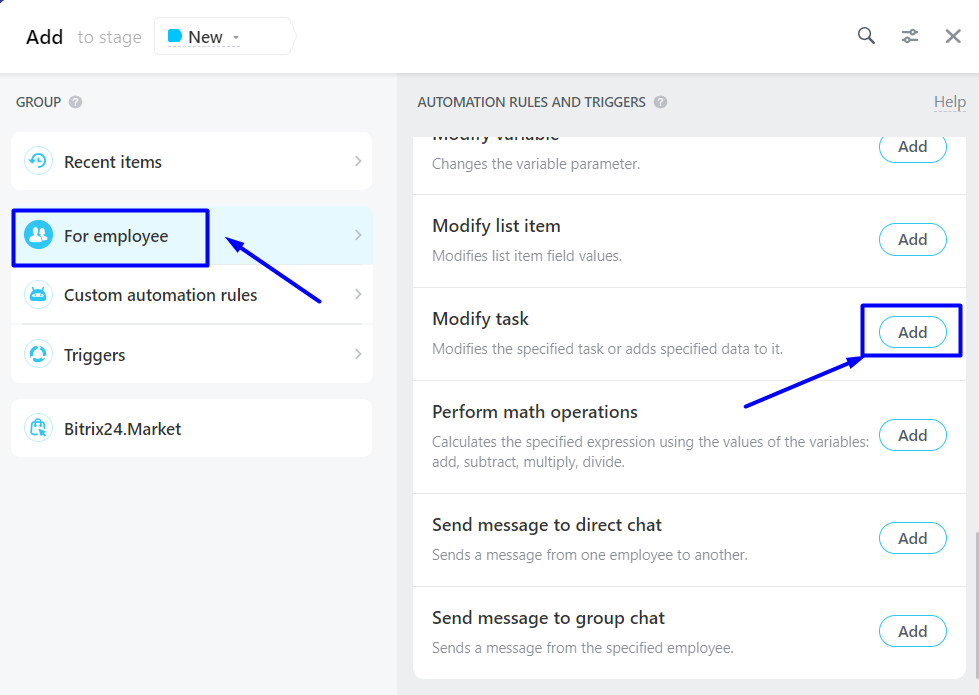
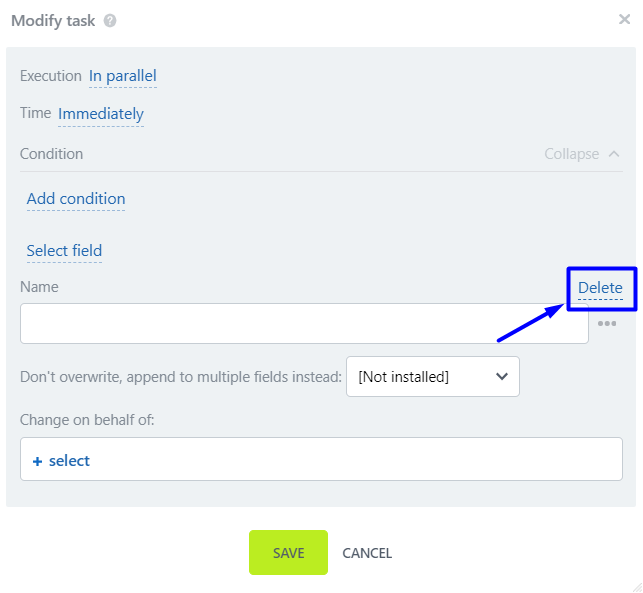
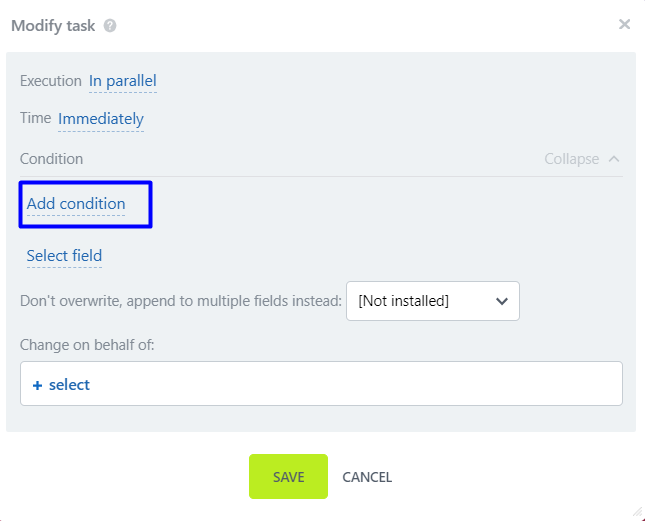
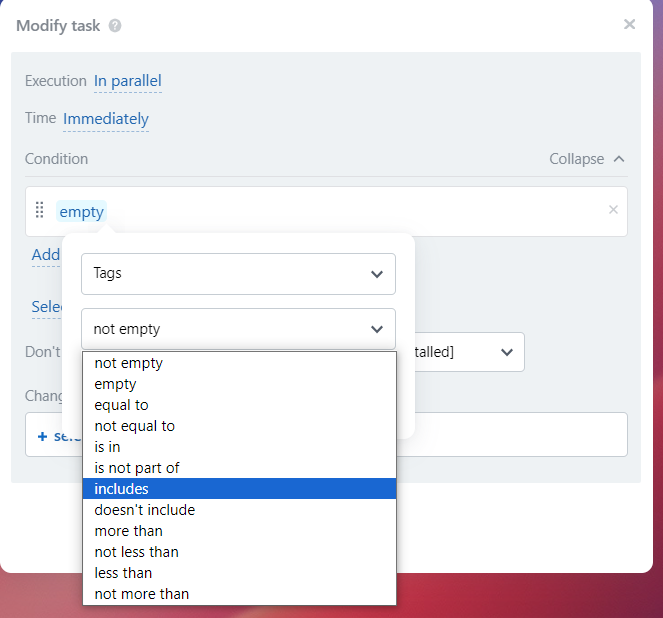
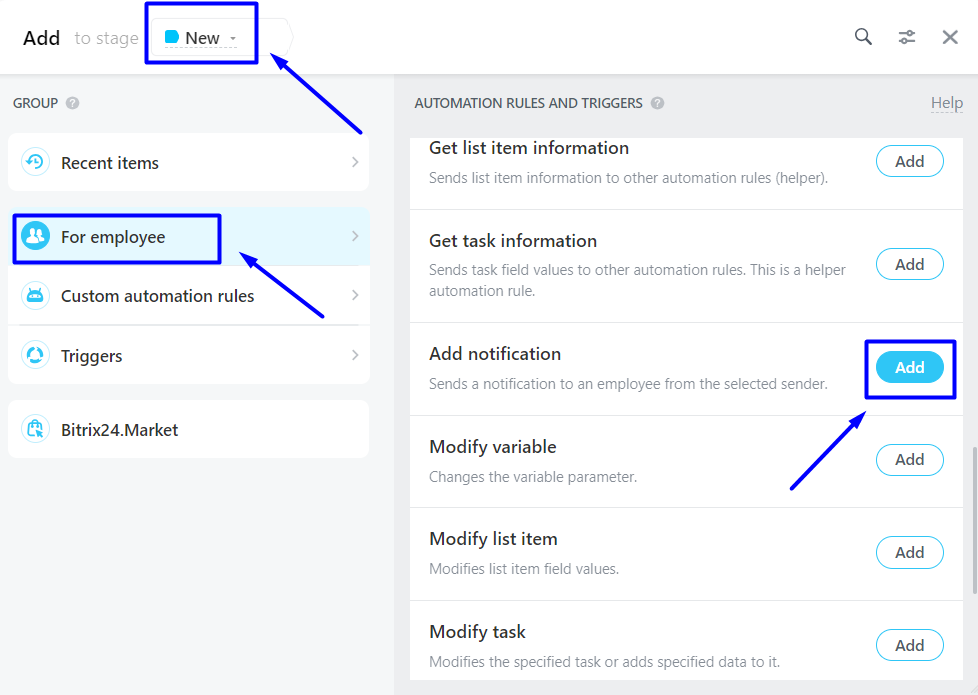
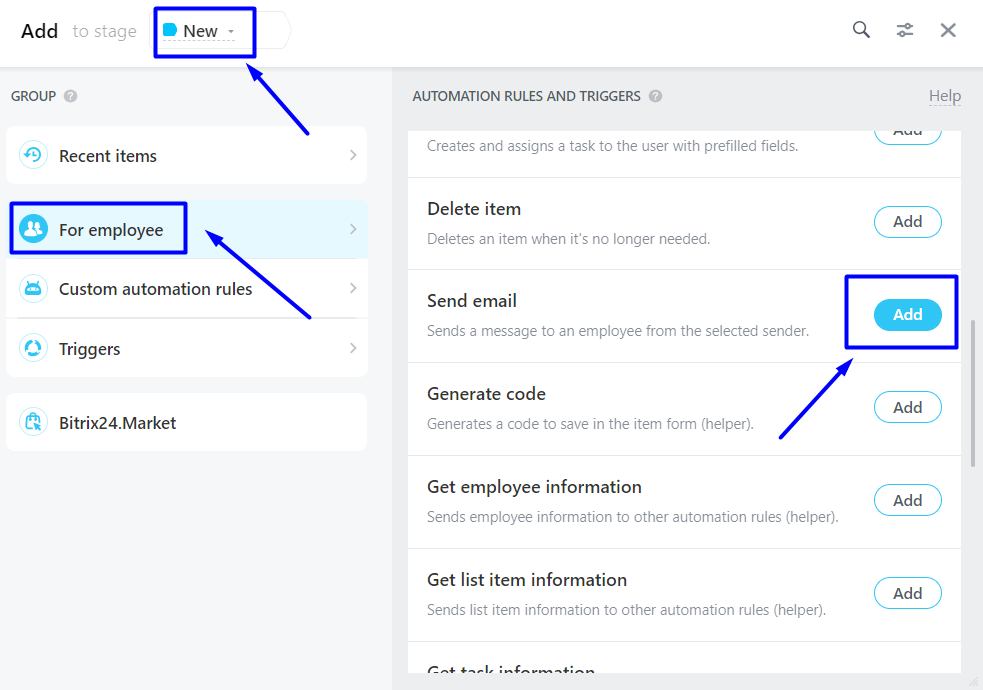
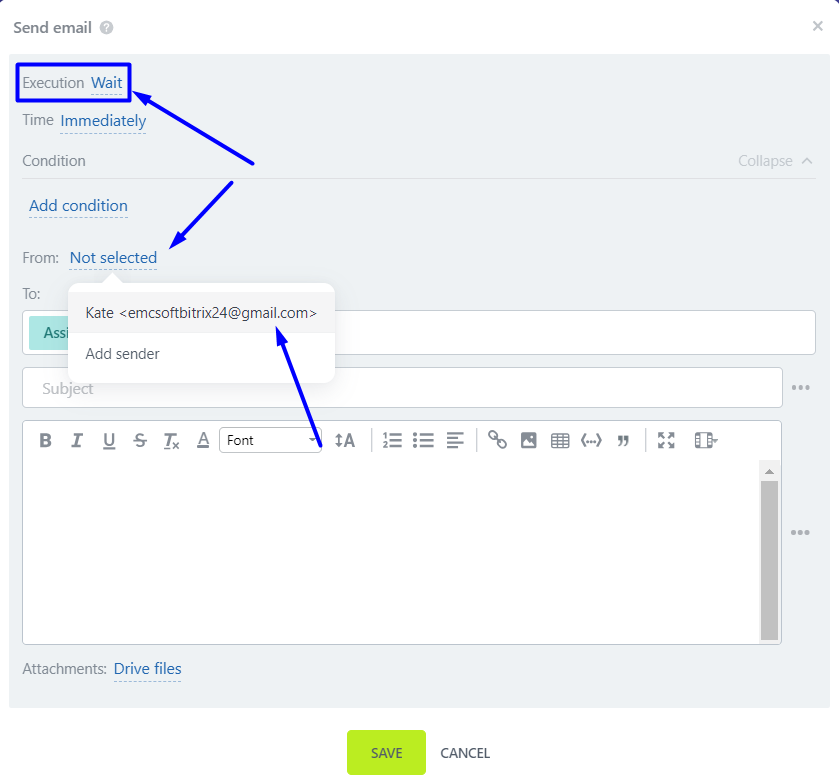
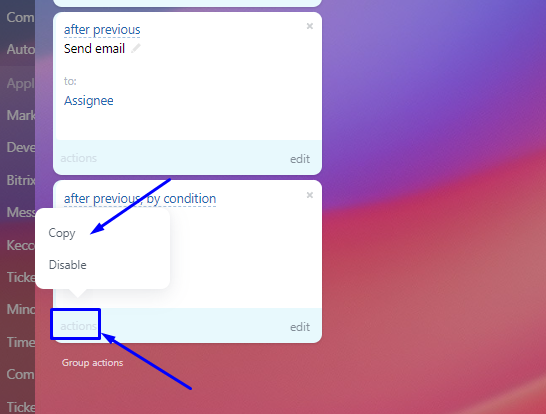
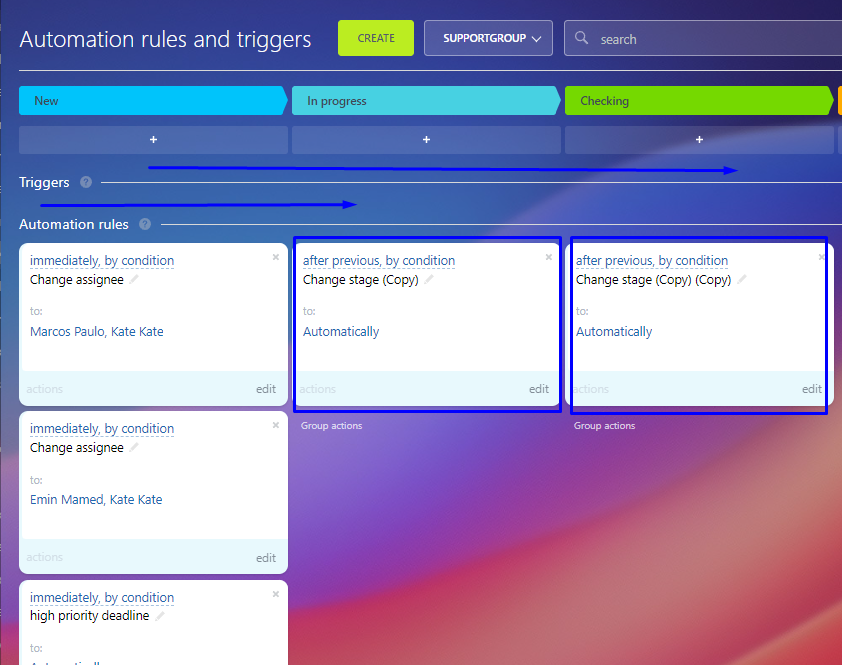
Tag settings are done with standard Bitrix tools - Robots, but you need to have a Professional plan for this, because smaller plans do not have robots.

It is not necessary to enter all tags. If you don't enter tags, they simply won't be available when creating a ticket.

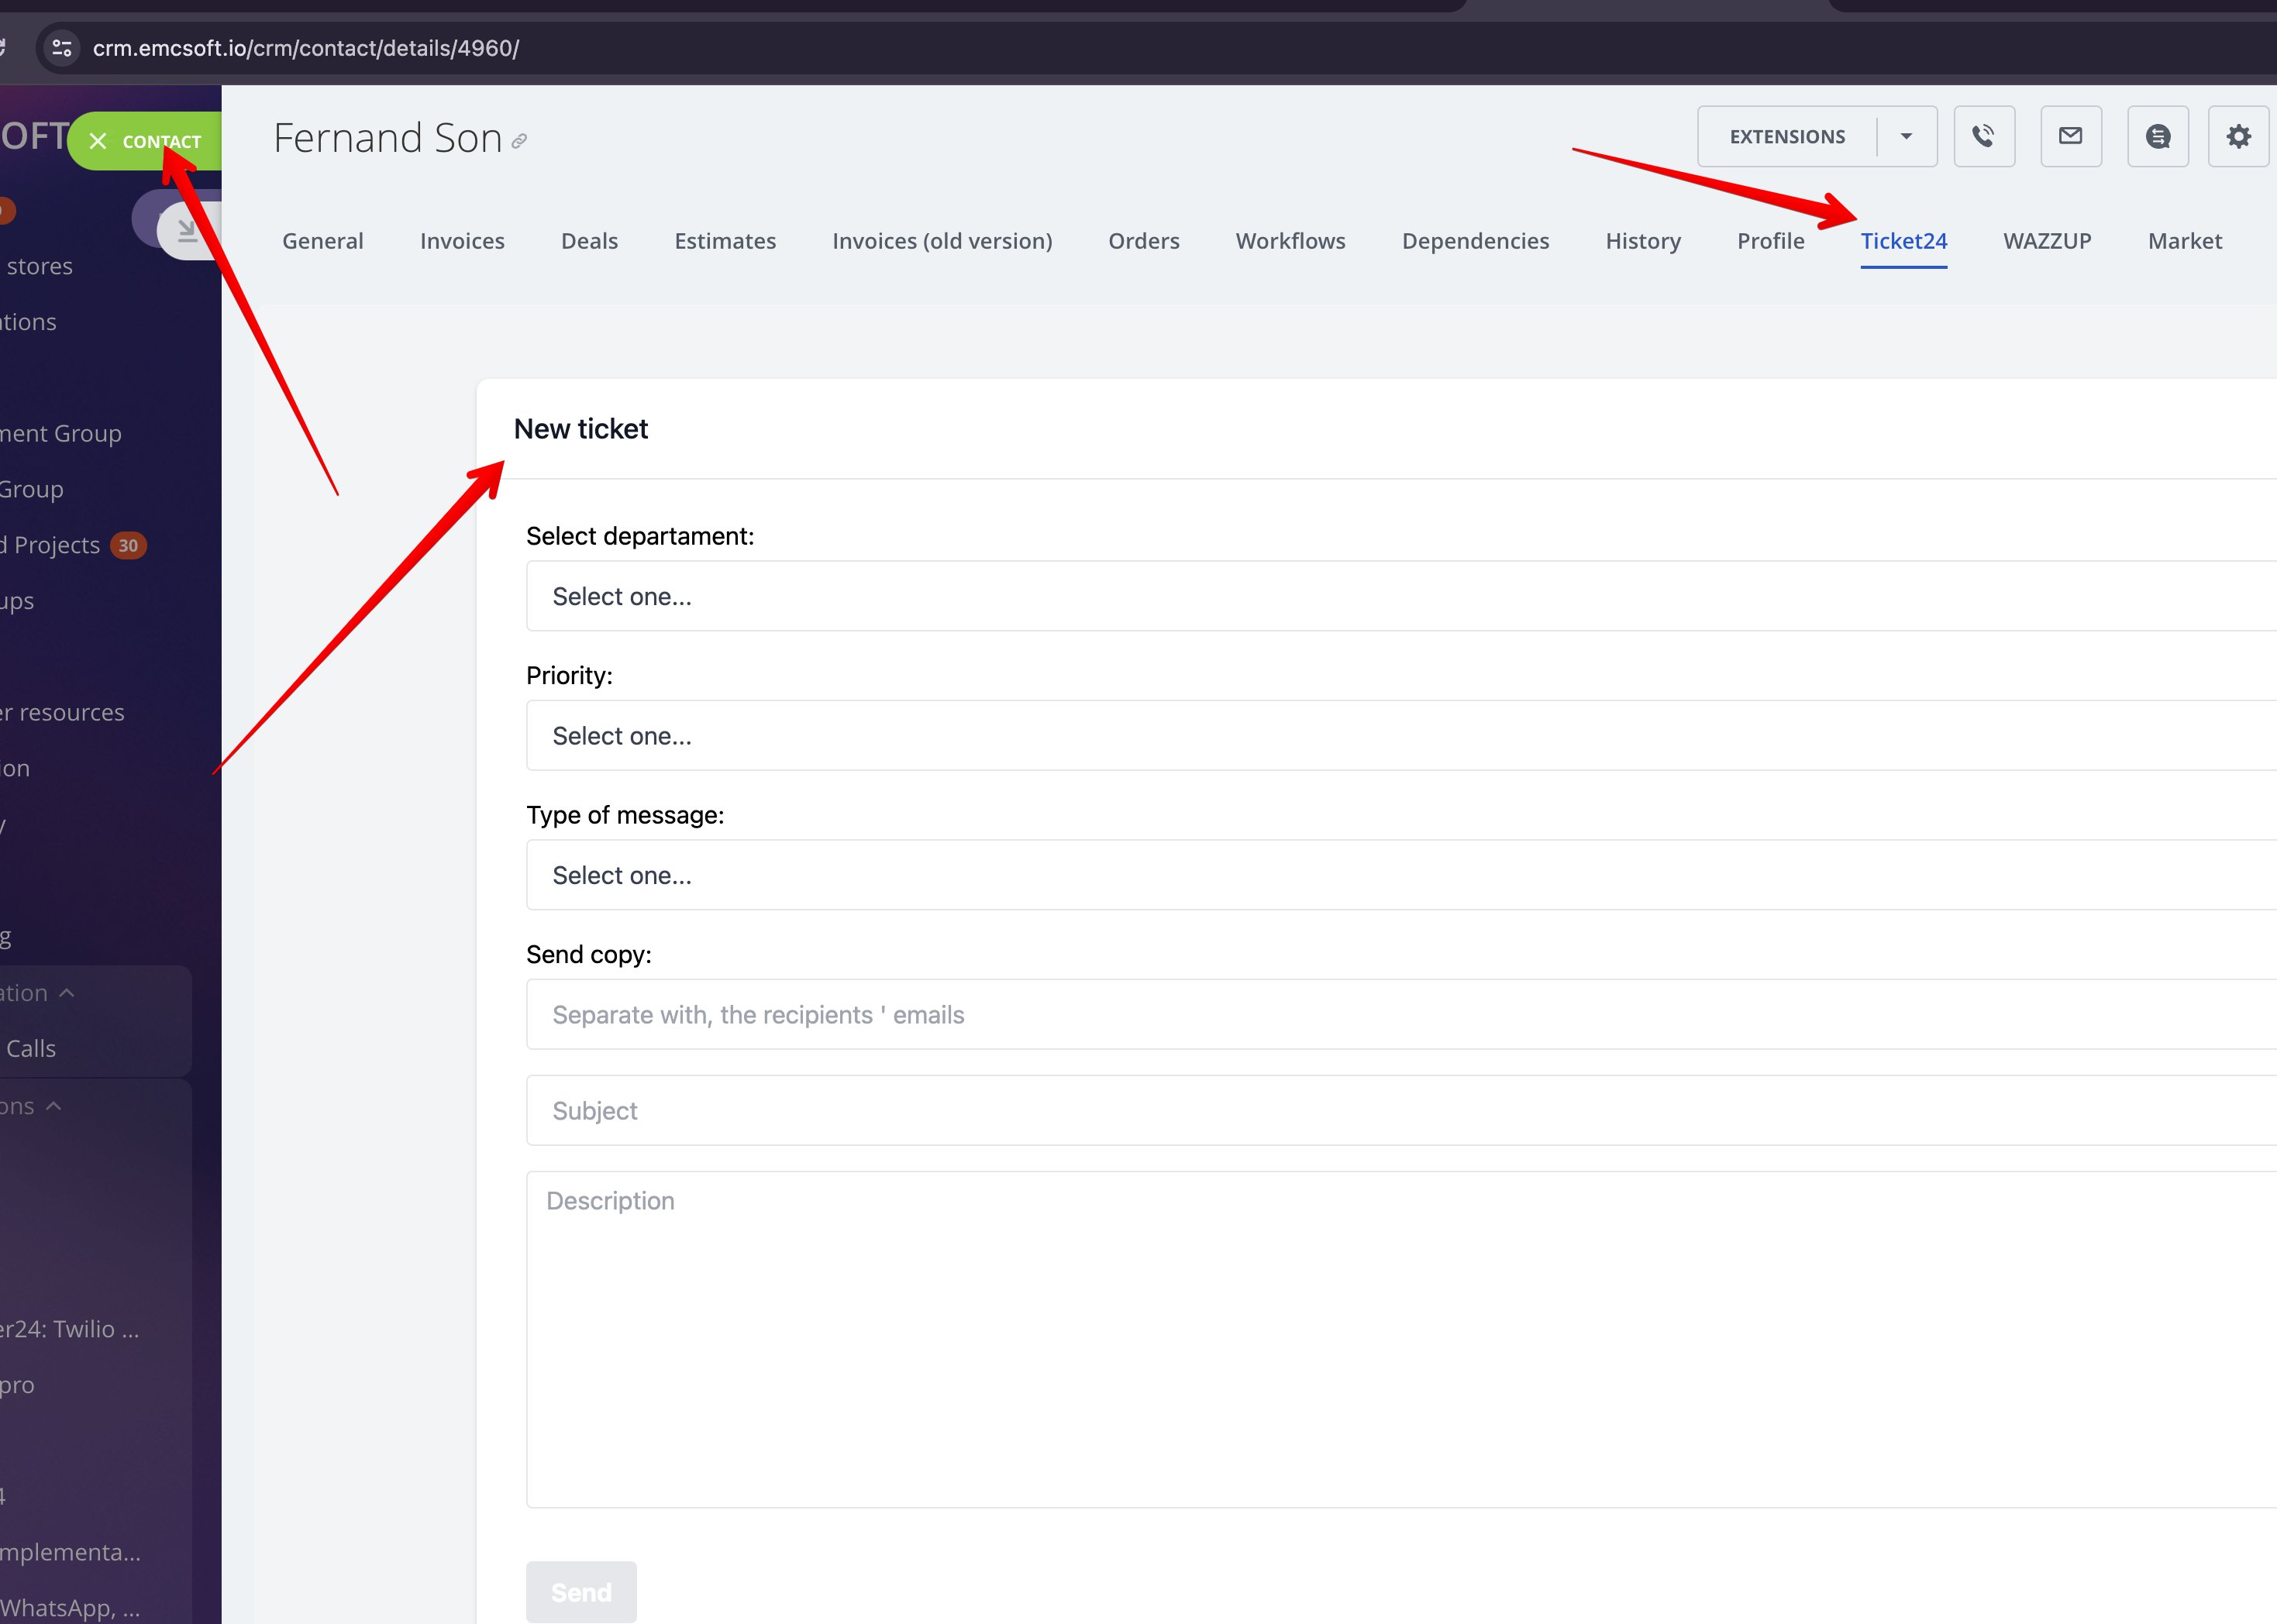
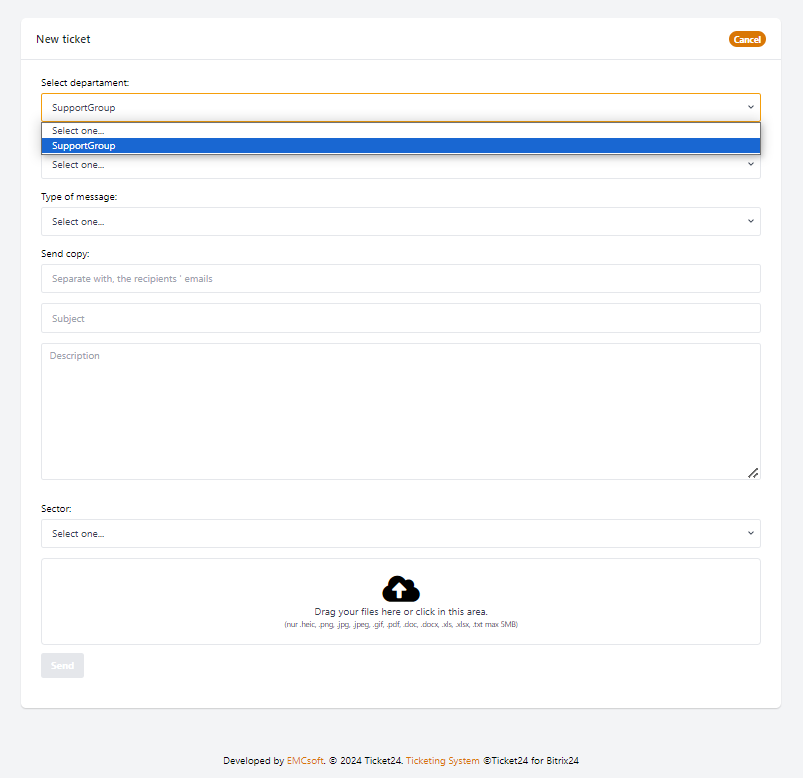
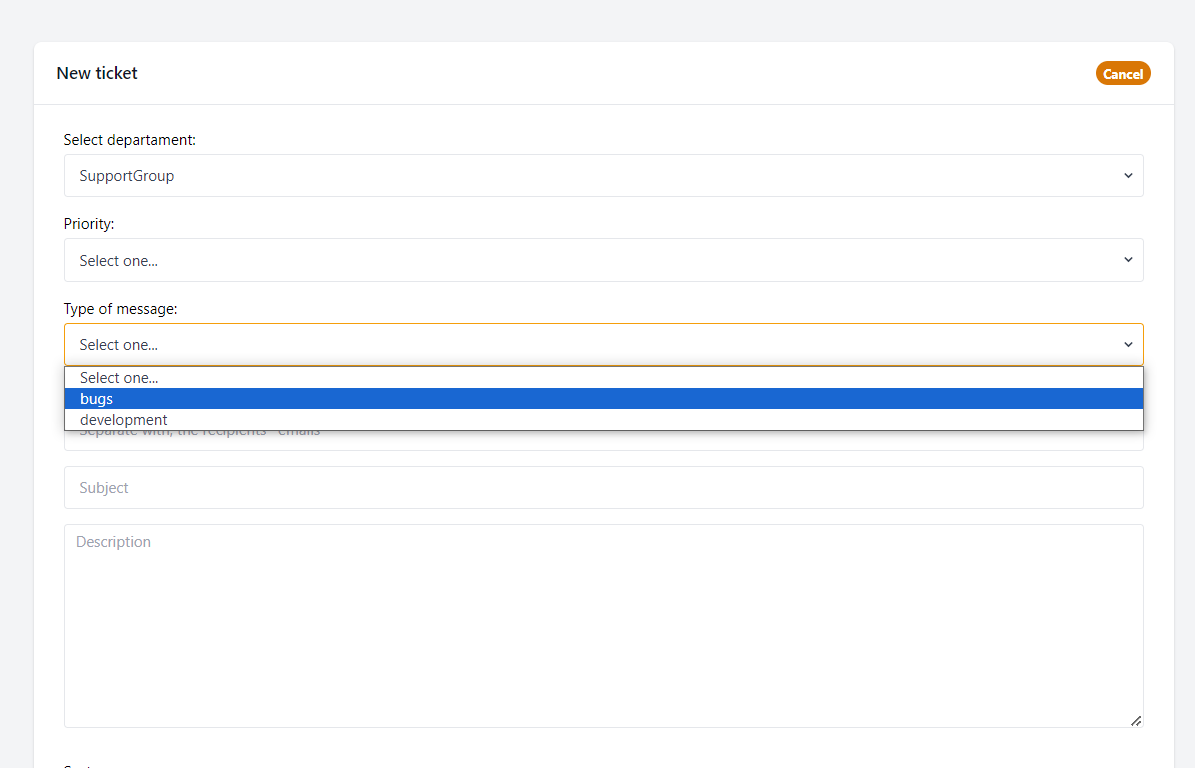
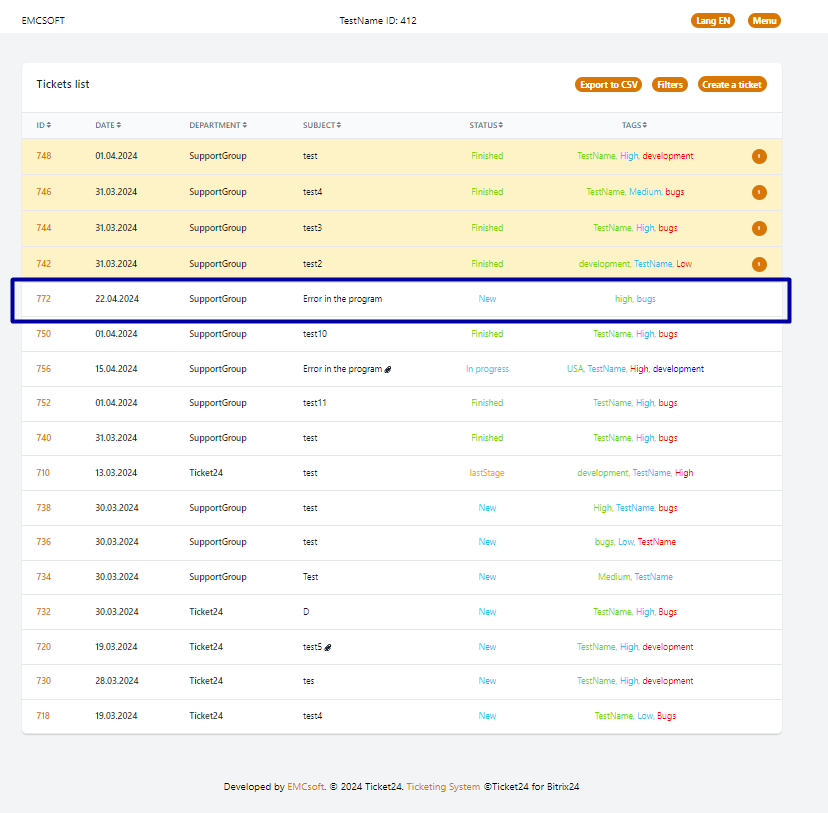
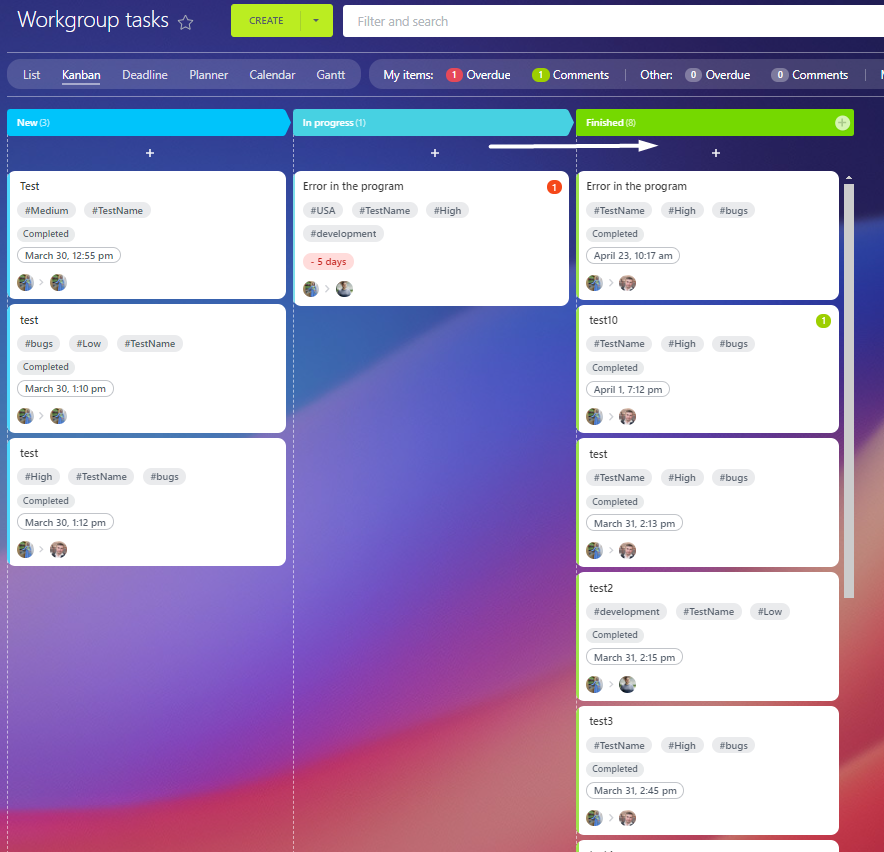
Section «Type of message»

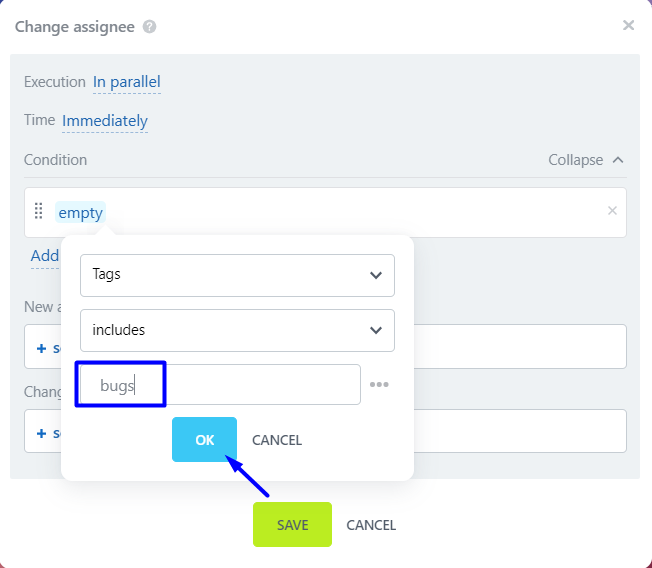
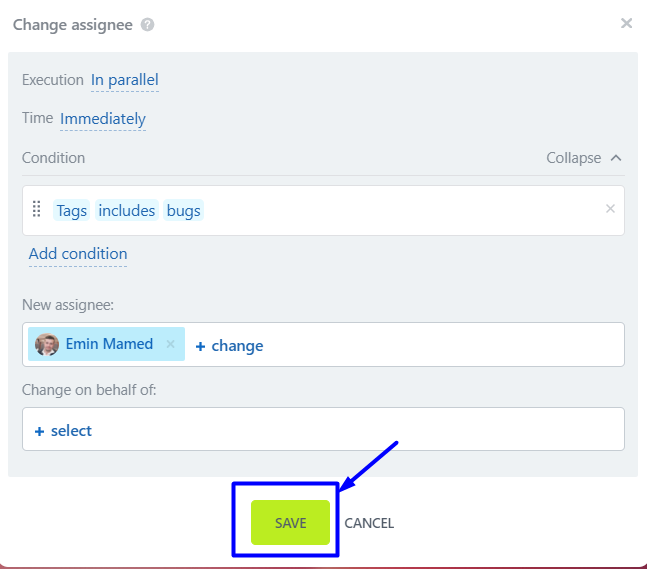
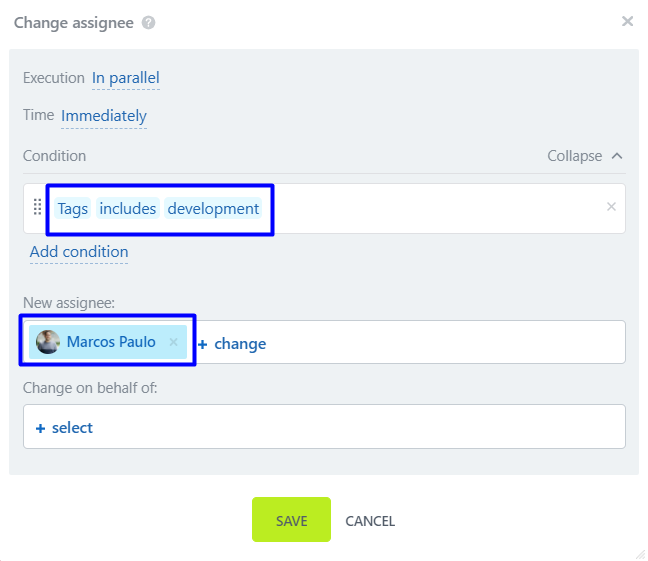
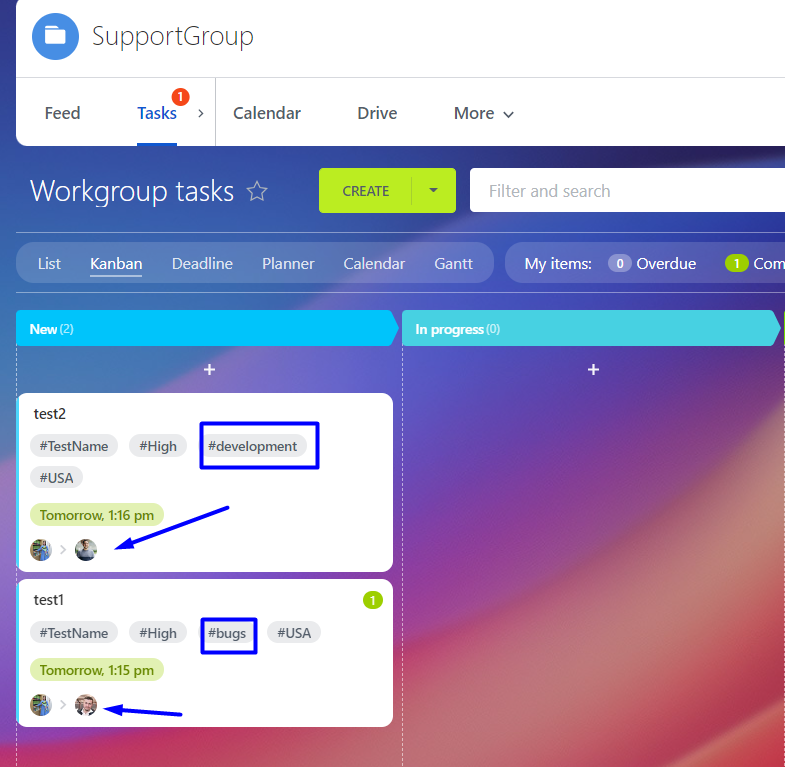
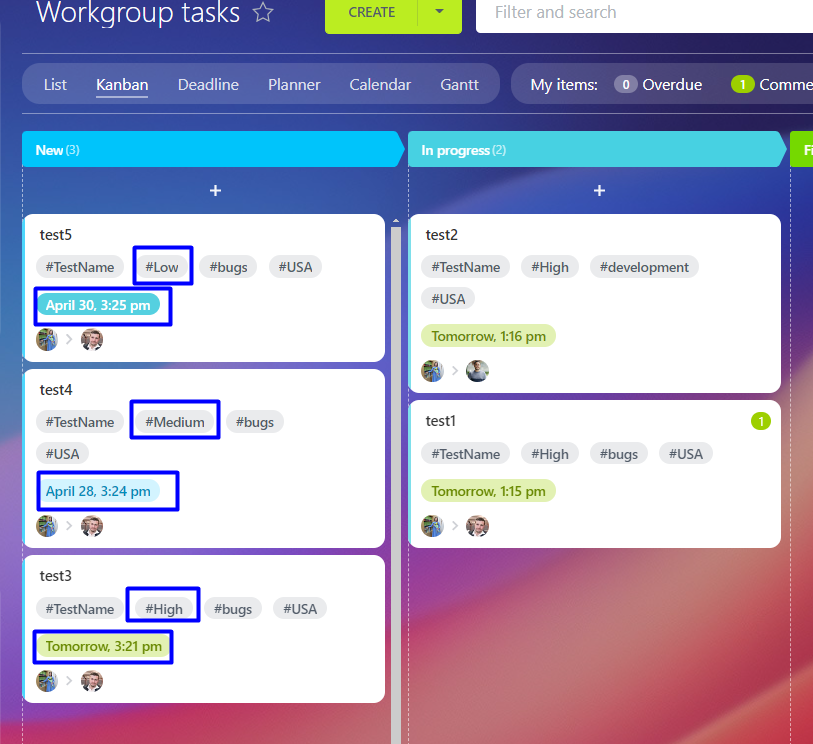
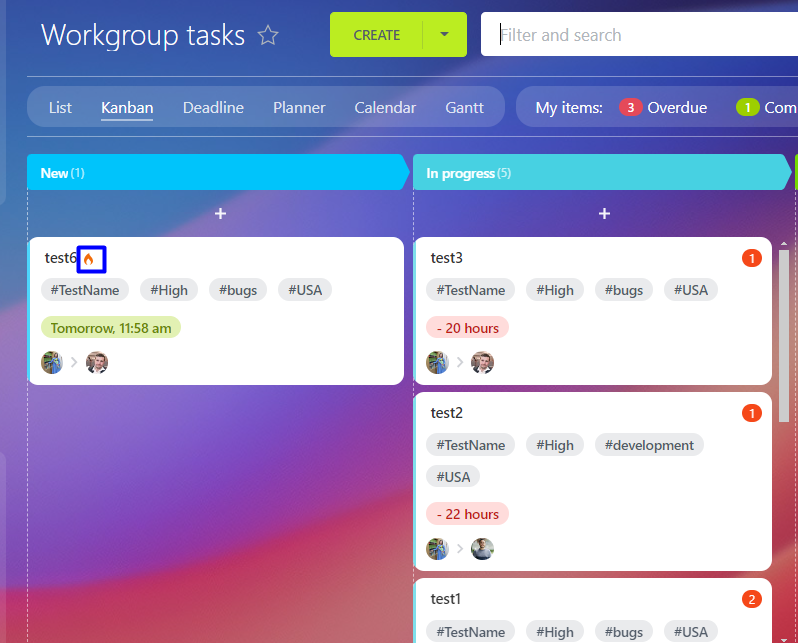
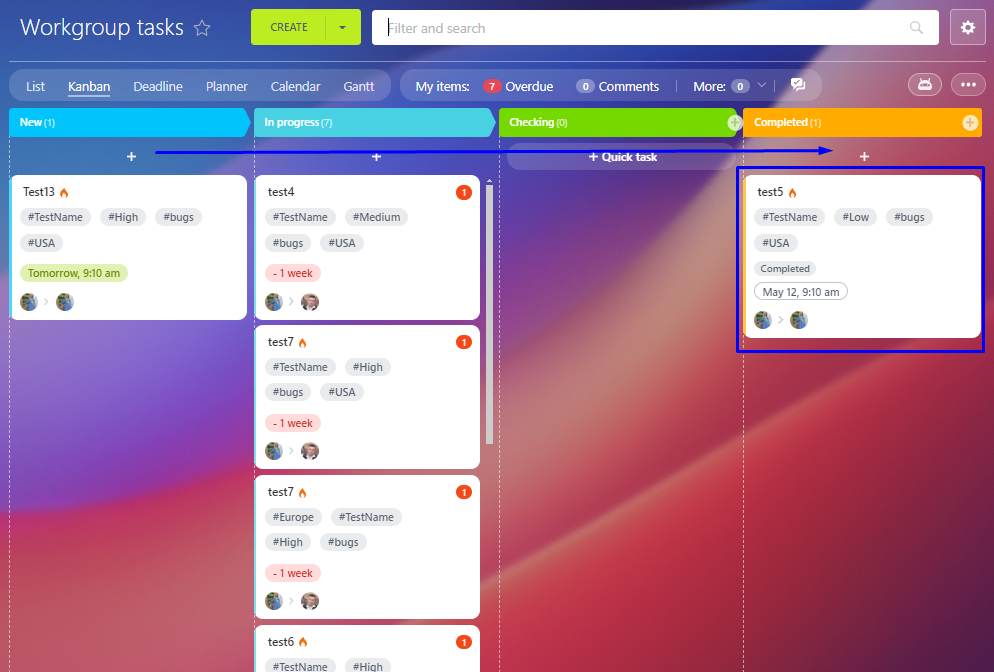
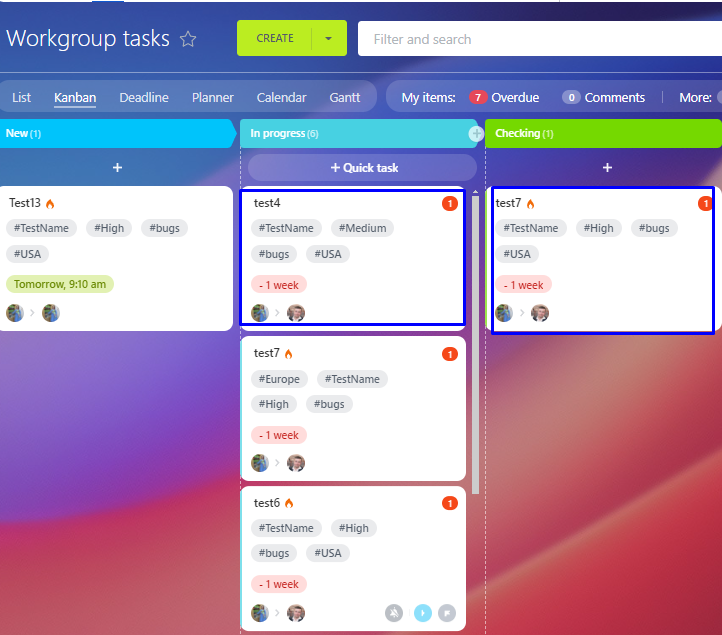
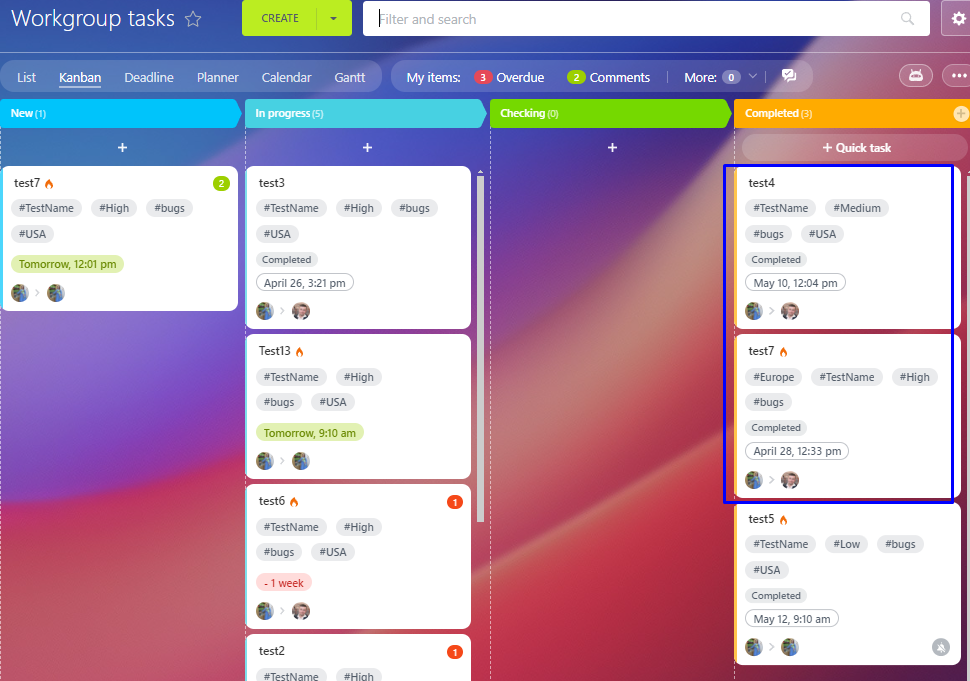
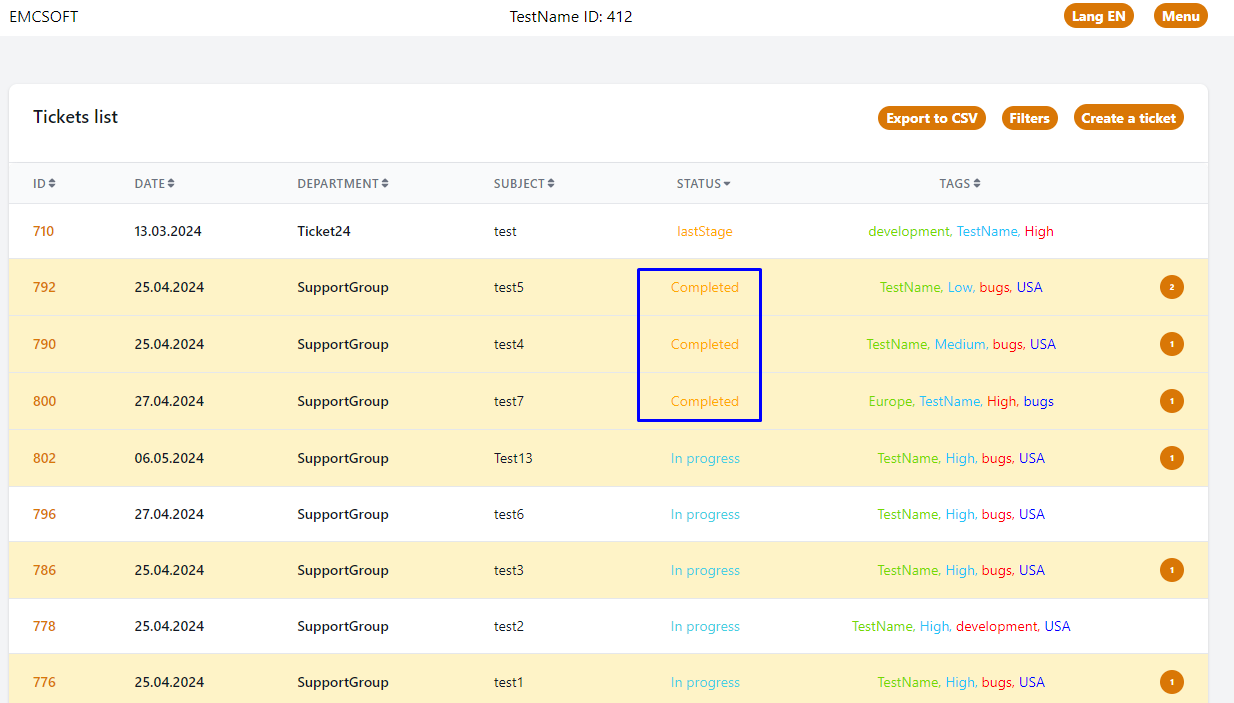
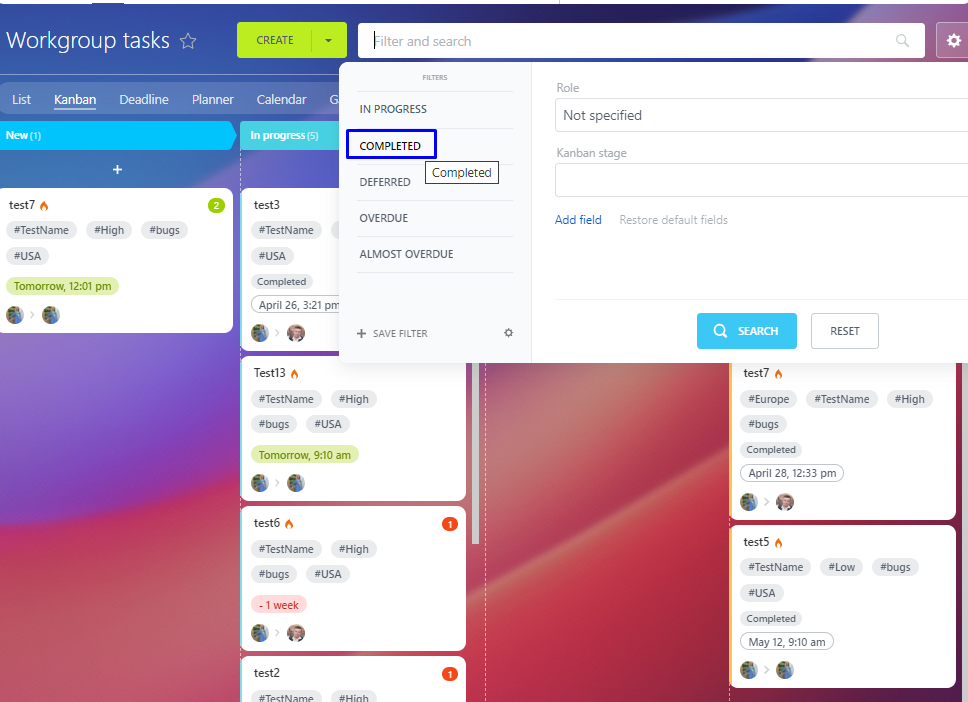
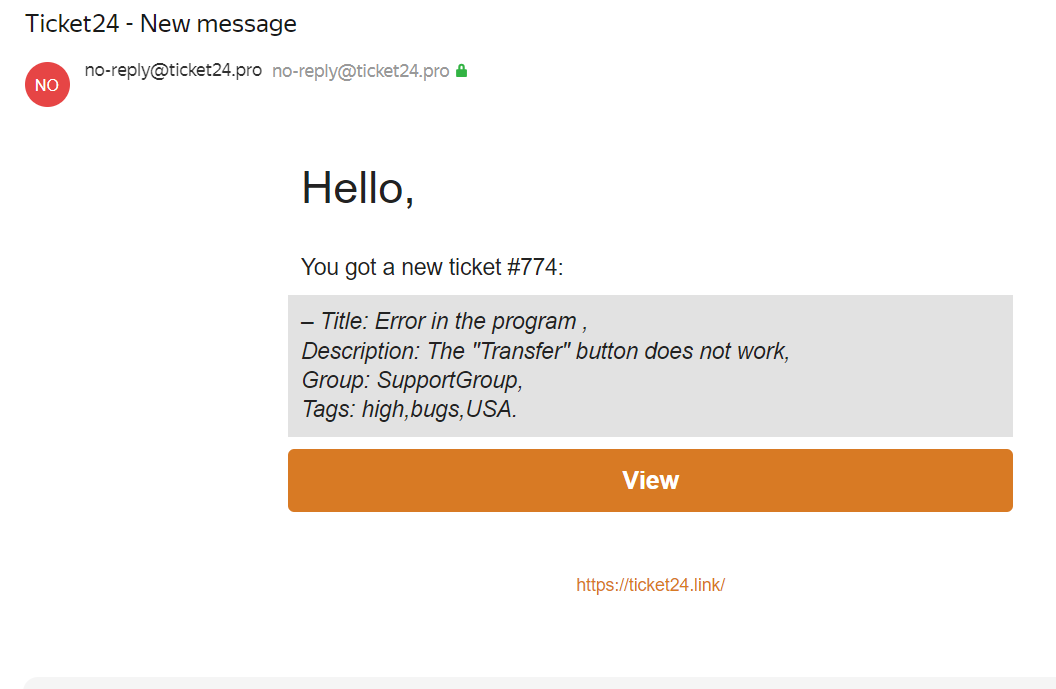
In this example, tags «bugs», «developmen» are assigned.
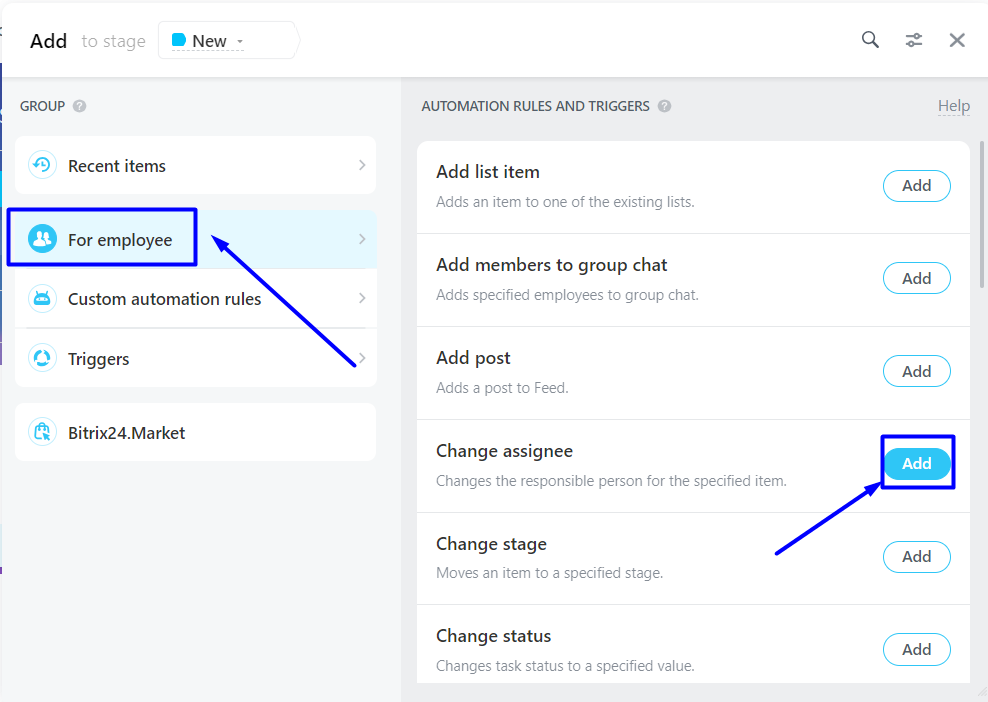
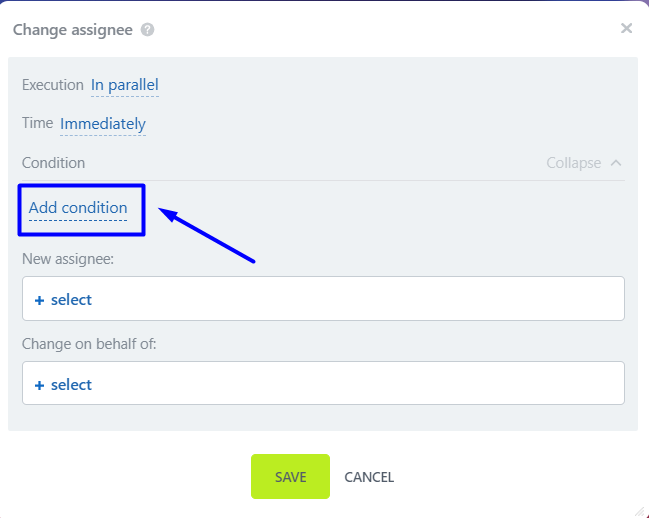
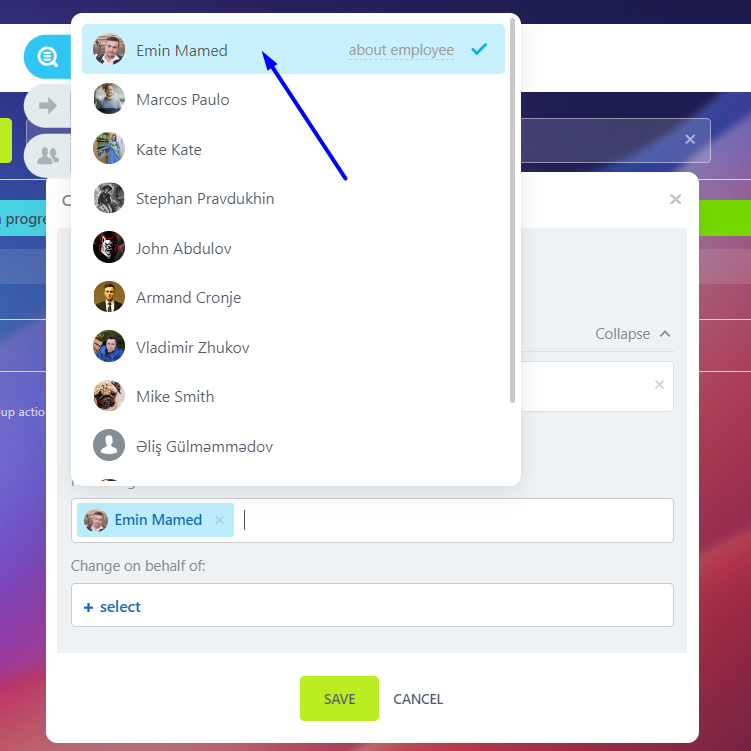
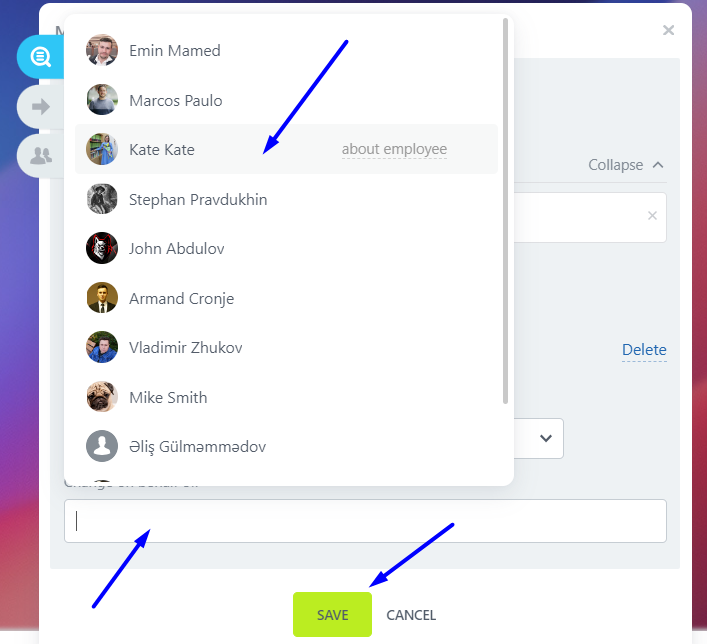
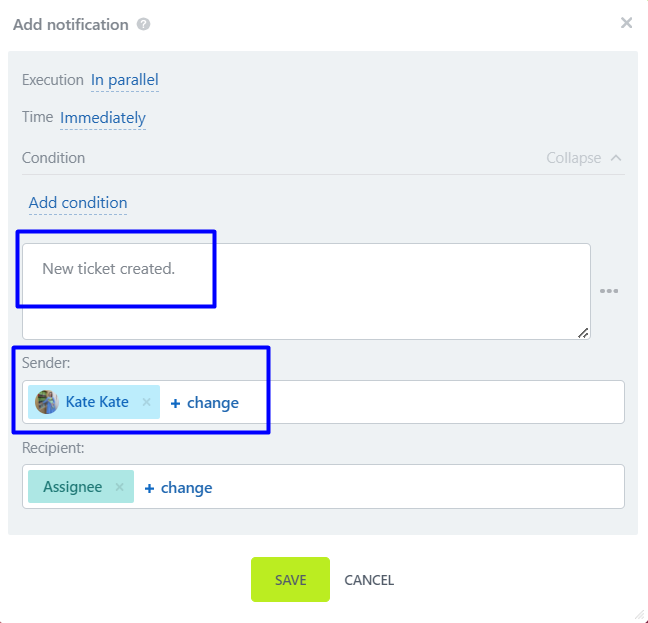
These tags determine the responsible person who will handle the ticket.
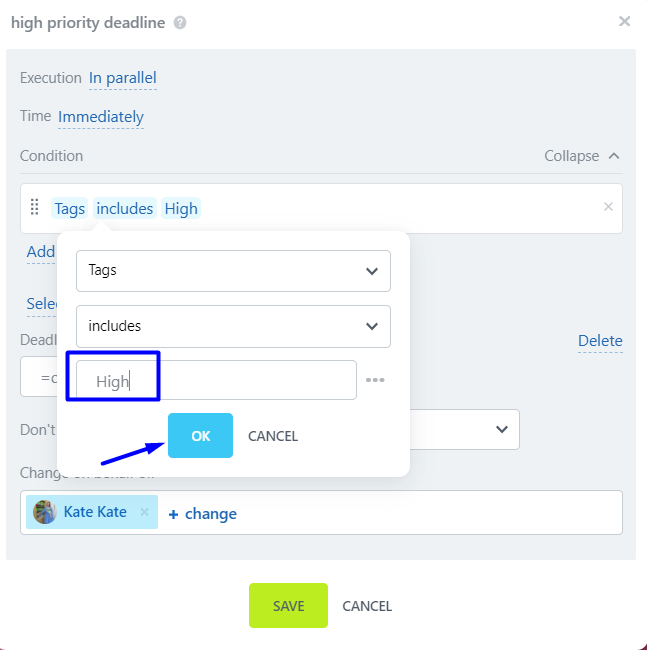
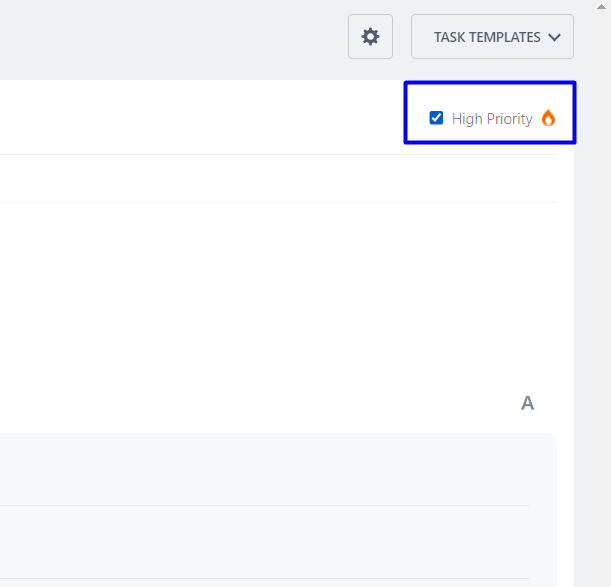
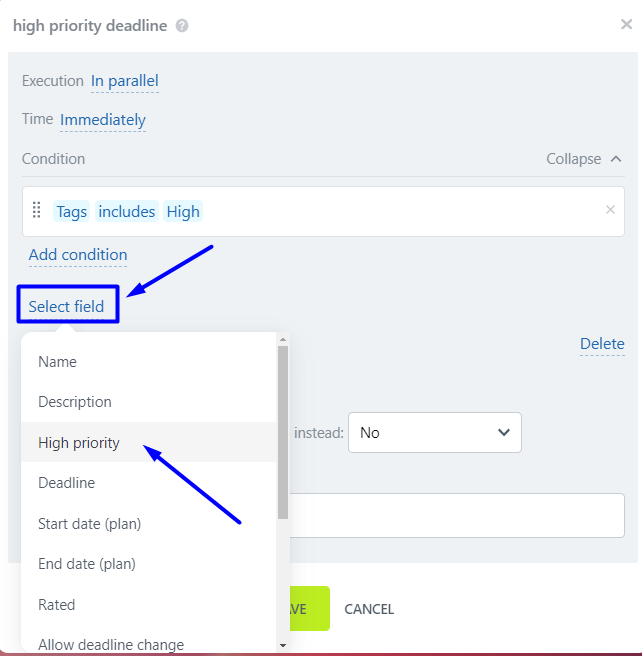
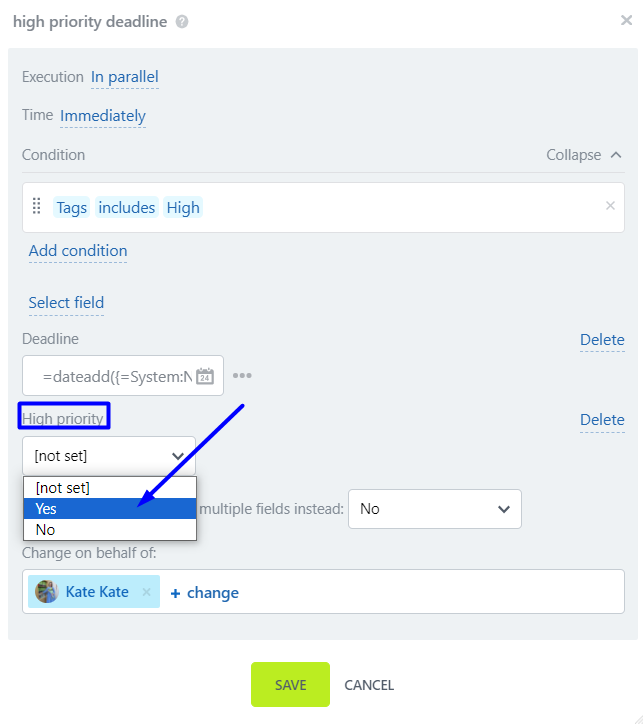
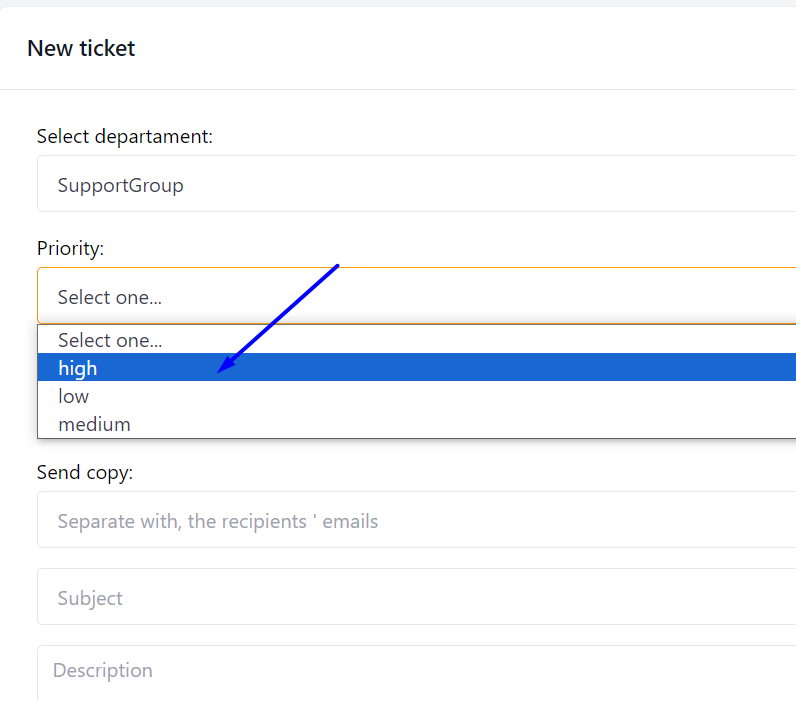
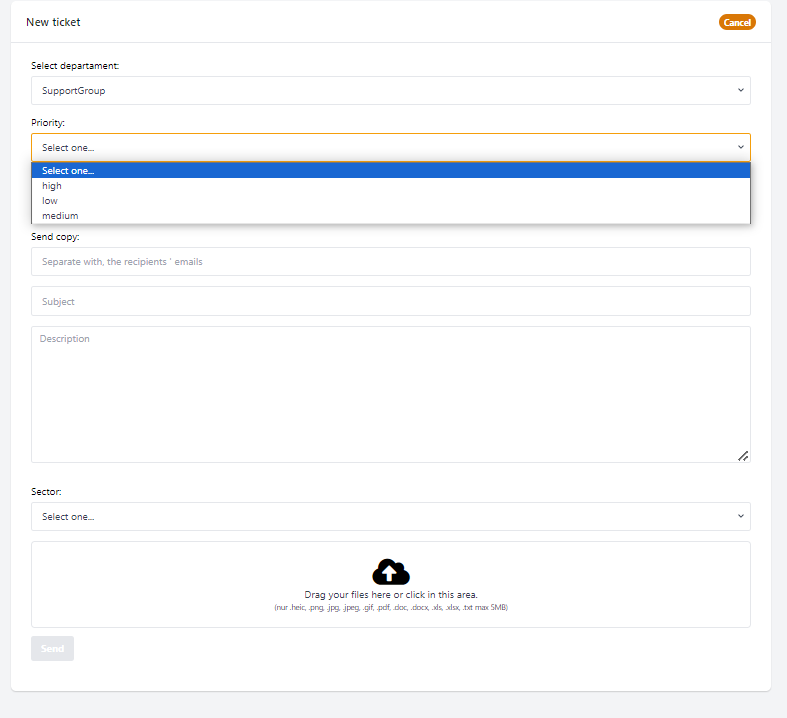
Section «Priority»

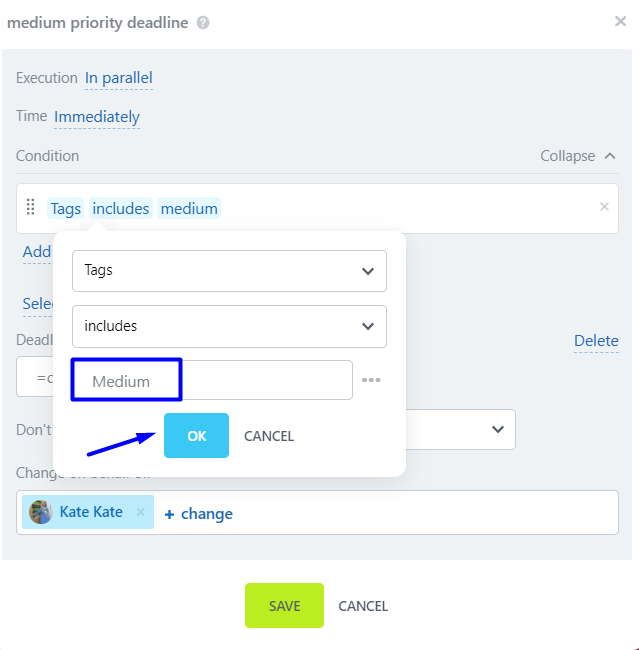
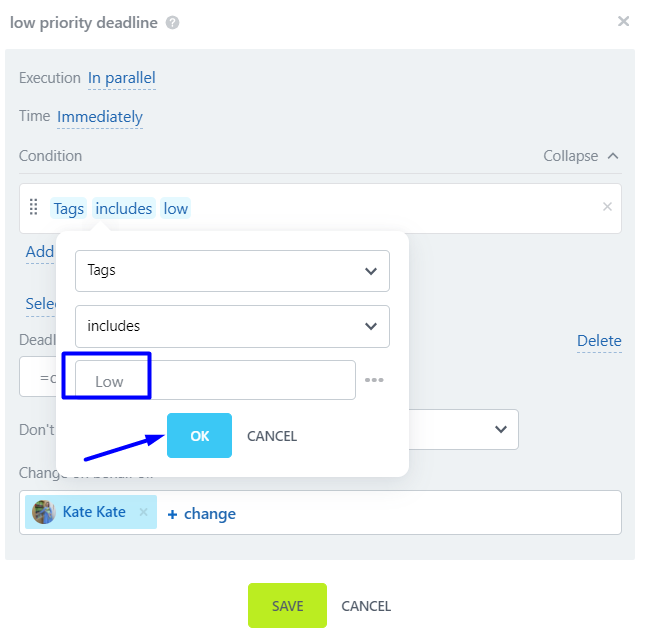
In this example, tags «high», «low», «medium» are assigned.
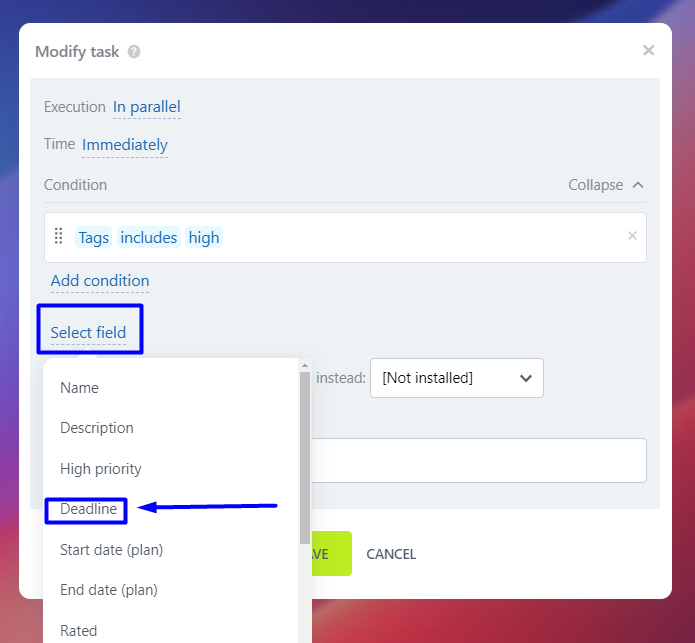
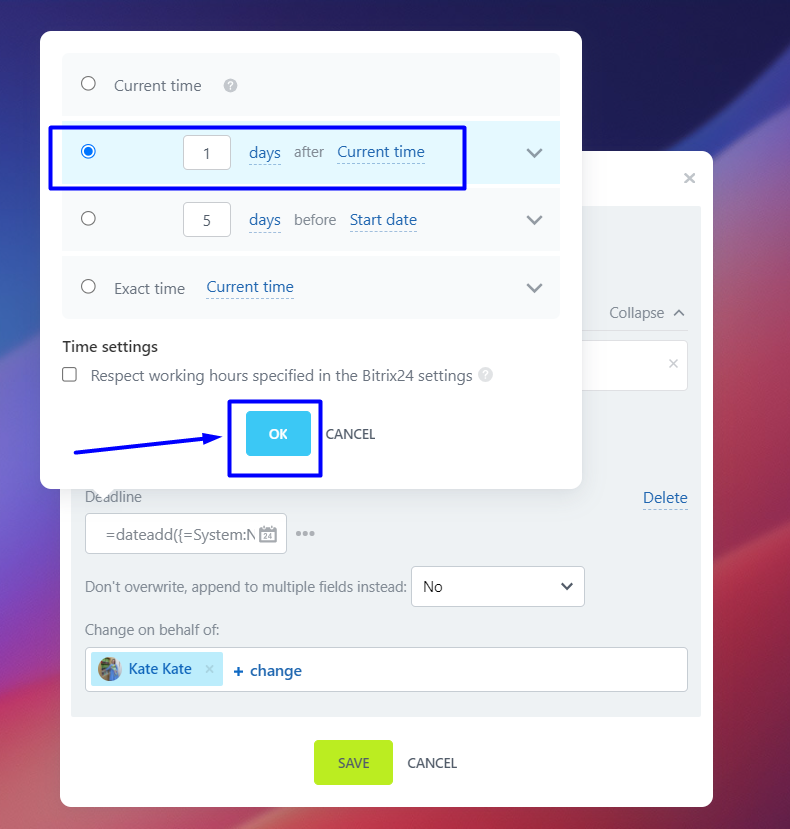
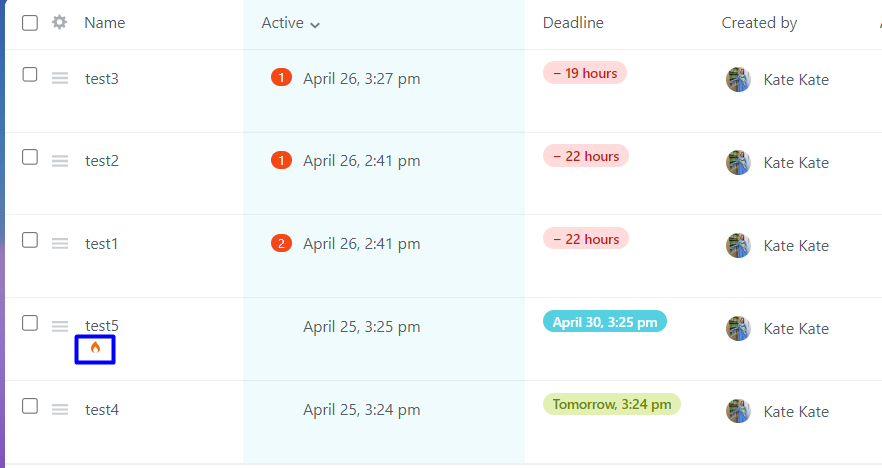
These tags assign different deadlines for ticket completion.
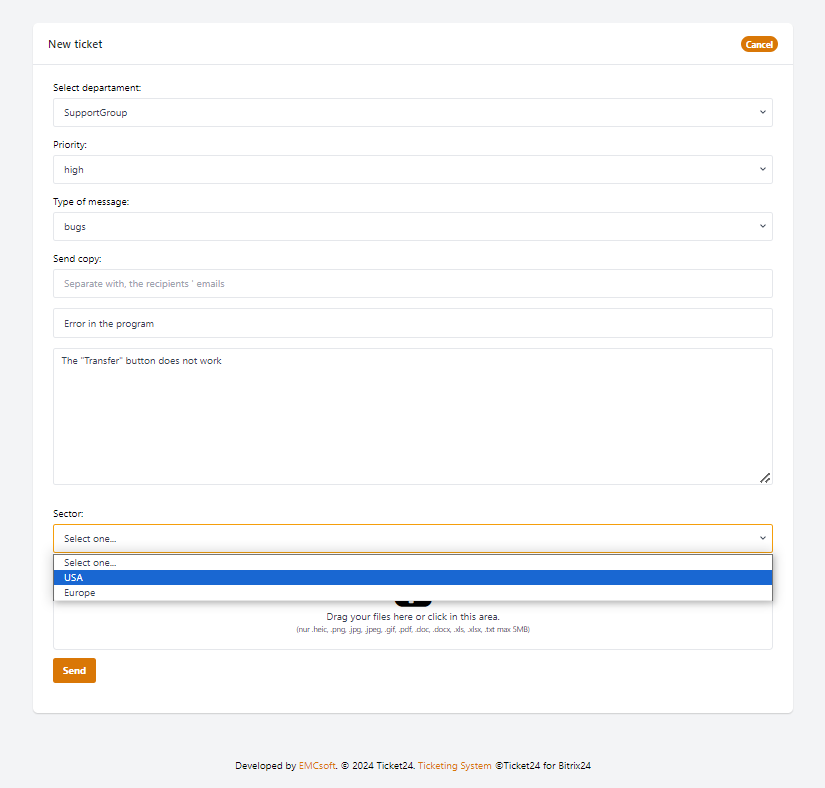
Section «Sector»

In this example, tags «USA», «Europe» are assigned.
The sector may refer to the region. For example, if the activity is in the USA, Europe, etc., the client selects USA in the ticket if they are from the USA.

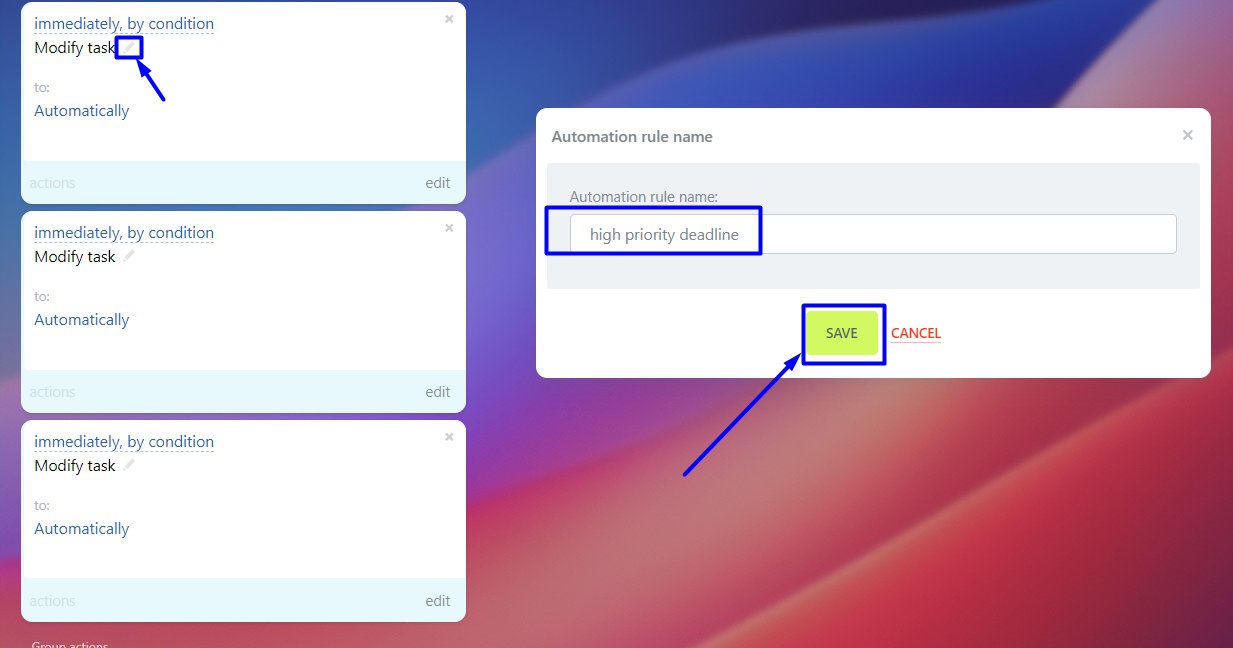
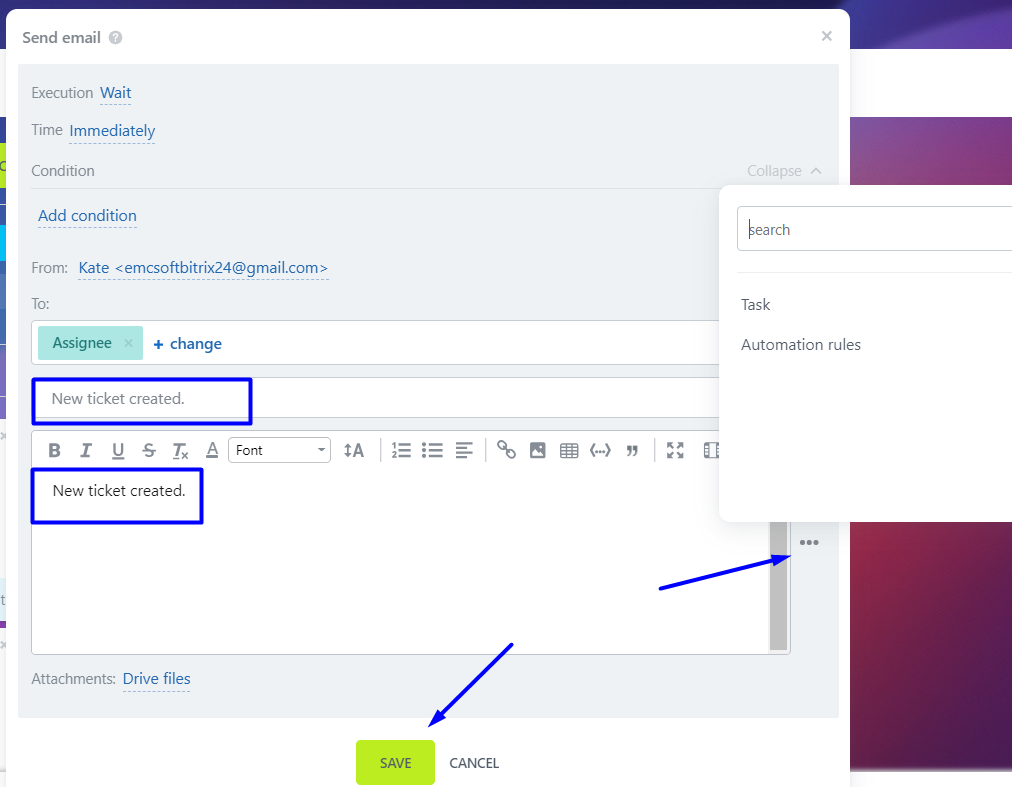
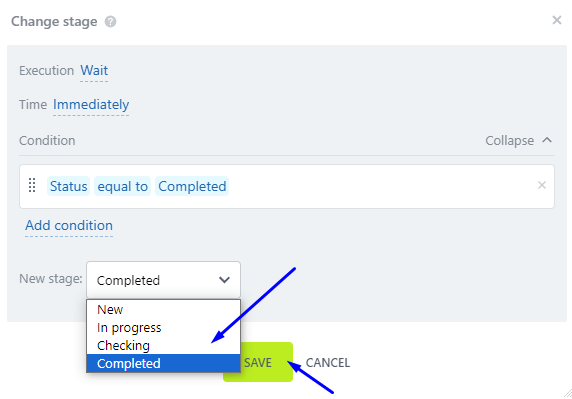
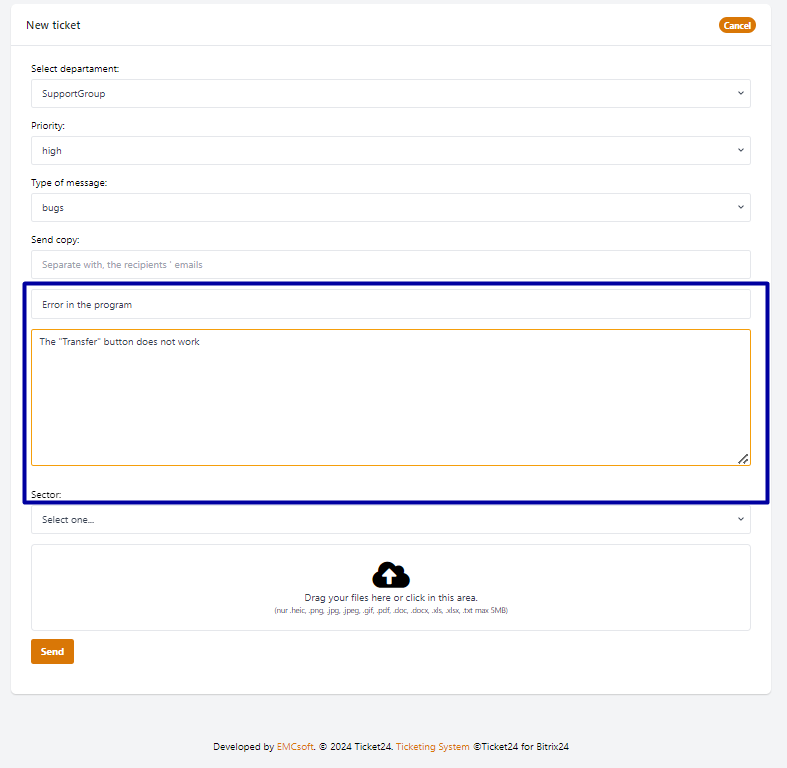
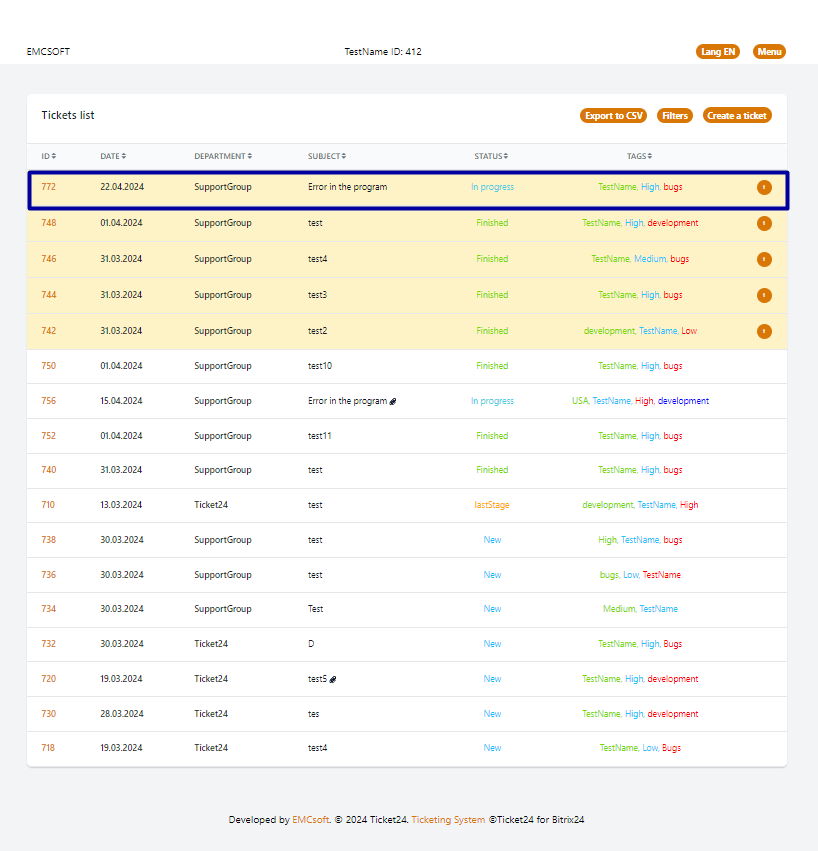
After setting all the configurations, remember to save all changes.

SETTINGS FOR TAGS BY ROBOTS

Specify all possible scenarios based on the tags selected by the client when creating tickets.

It is necessary to configure automation rules for tickets in the group where tickets are created. This can be done using Robots.

To access the automation slider, click on Robots in the funnel or in the CRM elements list.

TAGS FOR TYPE OF MESSAGE

1.

Write automation rules depending on the message type selected by the client using the tags «bugs», «development».

Let's consider setting up robots for the «bugs» tag.

To add a robot, click on the «Create» button or the «+» button below the stages.

2.

Select the stage «New».

3.

Choose the group «For employee», robot «Change assignee».

4.

Click the «Add condition» button in the «Condition« section.

5.

Click on an empty line with a condition.

6.

Click on the dropdown list with the value «ID», search through the search bar for «Tags», and click on the value «Tags».

7.

Click on the dropdown list with the value «not empty» and select the value «includes».

8.

Enter the value «bugs» in the field and click the «OK» button.

9.

Click the «Select» button in the «New assignee» section.

10.

Sel ect the assignee fr om the list of employees.

11.

So, the setup for the 'bugs' tag robot looks like this.

Click the «Save» button.

12.

To set up the robot for the «development» tag, you need to repeat steps 1-11 of the instructions.

In the end, you should have a robot.

In the condition, enter «If Tags include development, then the ticket assignee should be ...»

TESTING TAGS «BUGS», «DEVELOPMENT» WHEN CREATING A TICKET

When a ticket is received from the client, the responsible person for handling the ticket is automatically assigned.

Important note! Different employees are currently assigned for tickets depending on the tag selected by the client when creating the ticket.

TICKET TAGS BY PRIORITY

1.

When creating a request, the client can choose the priority of ticket execution: high, medium, low.

Create a robot for the task processing time based on the priority selected by the client.

By default, the task processing time occurs instantly, in the same second, so everything needs to be configured:

For example, priority «high» - 1 day, «medium» - 3 days, «low» - 5 days.

Let's create a robot for the «high» tag.

To add a robot, click on the «Create» button or the «+» button below the stages.

2.

Select the stage «New».

3.

Choose the group «For employee», robot «Modify task».

4.

Delete the field with the name.

5.

Click the «Add condition» button in the «Condition» section.

6.

Click on an empty line with a condition, then on the dropdown list with the value «ID», search through the search bar for «Tags», and click on the value «Tags».

7.

Click on the dropdown list with the value «not empty» and select the value «includes».

8.

Enter the value «High» in the field and click the «OK» button.

9.

Click «Select field» → «Deadline».

10.

Select the value «1 day» and click the «OK» button.

11.

Choose «Change on behalf of» in the «Administrator» column to indicate that the deadline change occurred automatically.

12.

To set up the robot for the «Medium» tag, you need to repeat steps 1-11 of the instructions.

In the end, you should have a robot.

In the condition, you need to write «If Tags include Medium, then the task completion time is 3 days...».

13.

To set up the robot for the «Low» tag, you need to repeat steps 1-11 of the instructions.

In the end, you should have a robot.

In the condition, you need to write «If Tags include Low, then the task completion time is 5 days...».

14.

To change the name of the robot, you need to click on the pencil icon and enter the new name.

15.

When a ticket is created by the client, the deadline for completing the ticket is automatically determined.

Note! The deadline for completing the ticket currently varies depending on the tag selected by the client when creating the ticket.

NOTIFICATION SETTINGS

SETTING UP THE «IMPORTANT TASK» ICON

1.

In the task tool, there is a built-in mechanism called «High Priority», which is activated by checking the box in the top right corner of the task creation window.

2.

Thus, in the task list, this task with high priority will be highlighted using an icon.

3.

You can configure automatic highlighting of tasks with high priority using robots.

To add a robot, click on the «Create» button or the «+» button below the stages.

Select the stage «New». Choose the group «For employee», robot «Modify task».

4.

Delete the name field.

5.

Click the «Add condition» button in the «Condition» section.

Click on an empty line with a condition, then on the dropdown list with the value «ID», search through the search bar for «Tags», and click on the value «Tags».

6.

Click on the dropdown list with the value «not empty» and select the value «includes».

7.

Enter the value «High» in the field and click the «OK» button.

8.

Click «Select field» and choose «High priority».

9.

Select «Yes» in the «High priority» field, then click the «Save» button.

10.

Test the execution of the ticket processing rule.

Create a ticket in your account and select «High» as the value in the «Priority» field.

11.

The ticket was received by the manager with the «High Priority» icon.

NOTIFICATION SETTINGS in the workgroup

1.

To set up notifications for the manager when creating a new ticket.

Create a new robot. Choose the stage «New», group «For employee», robot «Add notification».

2.

Enter the notification text and choose the message sender.

3.

In the «Exucution» section, change the value to «Wait». The robot should perform the action after the previous robot has completed.

Click the «Save» button.

4.

After creating the ticket, the manager receives a notification about the new ticket.

EMAIL NOTIFICATION SETTINGS

1.

To set up notifications for the manager via email when creating a new ticket.

Create a new robot. Choose the stage «New», group «For employee», robot «Send email».

2.

In the «Exucution» section, change the value to «Wait». The robot should perform the action after the previous robot has completed.

Choose the message sender.

3.

Enter the subject and message textYou can use variables in the message text.

Click the «Save» button.

4.

When a new ticket is created, the responsible employee receives a notification via email.

5.

To receive this email, please provide your email address in your profile, and the message will be sent to it.

CONFIGURING CHANGE OF TASK STATUS

1.

To set up automatic status change for a task upon completion.

Create a new trigger. Choose the stage «Completed», group «Triggers», and select «Track task status change».

2.

Select the task status «Completed».

3.

Create a robot to change the task status.

Select the stage «New», group «For employee», and robot «Change stage».

4.

Enter the condition: «Status», «equals to», «Completed».

Select the stage «Completed» to fulfill the condition.

This way, if a manager completes a task in CRM, it will automatically move to the «Completed».

5.

To complete the task, click on the «Complete» button, and the task will move to the «Completed» stage.

6.

After completing the task, it moved from the «New» stage to the «Completed» stage.

7.

Create a robot for transitioning from the stages «In progress» and «Checking» to the «Completed» stage.

Click on the «Actions» tab, then click the «Copy» button on the created robot for the «New» stage.

Repeat the action twice.

8.

Transfer the created robots to the stages «In progress» and «Checking».

9.

Test the execution of the rule on tasks «test4», «test7».

10.

When the manager completed the tasks, they moved to the «Completed» stage.

11.

In the client's personal account, completed tasks will be displayed with the status «Completed».

12.

To display tasks with the status «Completed», you need to select the «Completed» status in the filter.

CLIENT'S WORK IN TICKET24

1.

You can create a ticket from the Contact instead of the Client, and the ticket will appear in the client's personal account.

2.

Log in to the client's personal account (https://ticket24.link/login?pid=[your portal address]).

You will have your own unique link to the personal account, which you can obtain here.

3.

Go to the link and enter the login and password for the test client.

4.

You can get the login information for the test client here.

5.

The client's Personal Account displays a list of client requests.

6.

Click the «Create a ticket» button.

7.

Select the department to which the ticket will be submitted.

8.

Select the ticket priority.

Using tags such as «high», «low», «medium» different deadlines for completing the ticket are assigned.

9.

Choose the message type.

Using tags such as «bugs», «development» the responsible person who will handle the ticket's work is determined.

10.

You can duplicate the ticket to email.

11.

Enter «Subject» and «Text» of the ticket.

12.

Select the country you live in.

Using the tags «USA», «Europe» the client's region of residence is determined.

13.

Files explaining the issue can be attached to the ticket.

After entering all the data into the ticket, click the «Send» button.

14.

After sending, the ticket should appear in the list of tickets.

At the moment, the ticket is in the «New» status.

15.

The ticket status changes to «In Progress» as soon as the manager starts working on it.

16.

You can see in the ticket who is responsible for handling it. 

Now you can correspond with the responsible specialist to resolve the issue.

17.

The client receives a notification about a new message in their email.

When a manager sends an email, it appears in the client's personal account, and the client receives an email notification about the new message.

18.

The client can write messages.

In response to a manager's email, the client can write a message, and this message is visible in the tasks in Bitrix24.

19.

The manager sees the client's messages in tasks in Bitrix24.

The manager receives a notification about this and can write a reply to the client.

20.

After resolving the issue, the manager needs to move the task to the «Completed» status.

21.

When closing the ticket, the client sees that the status has changed to «Completed».

22.

When the ticket is closed, it disappears from the client's personal account. You can view the ticket only if you enable «Show closed task» in the filters.